html & css 기초 되집기
작업 시작
- VSCord에서 파일을 생성
- ! + Tab
- 코드를 작성
스타일 시트 적용
스타일 지정방식 1
- 다음과 같은 방식으로 정한다.
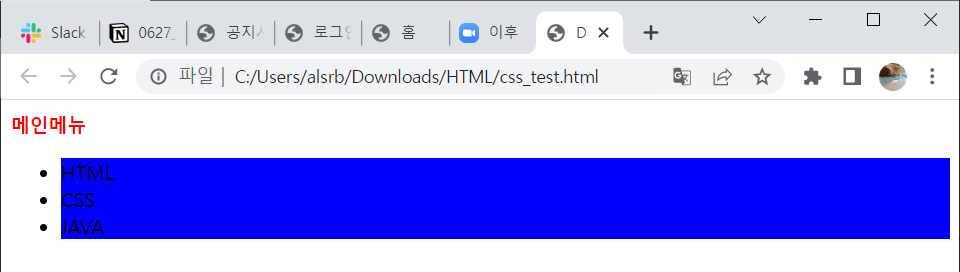
1 | <h1 style="color: blue;font: size 5px;">메인메뉴</h1> |
- 적용된 후의 출력이다

스타일 지정방식 2
- 다음과 같이 설정한다.
- h1 태그를 설정했으므로 h1으로 출력되는 글은 모두 blue로 나타난다.
1 | <style> |
스타일 지정방식 3
- style.css 파일
1 | h1{ |
- 사용할 css파일의 경로를 지정한다.
1 | <title>Document</title> |
- 다음과 같이 출력된다
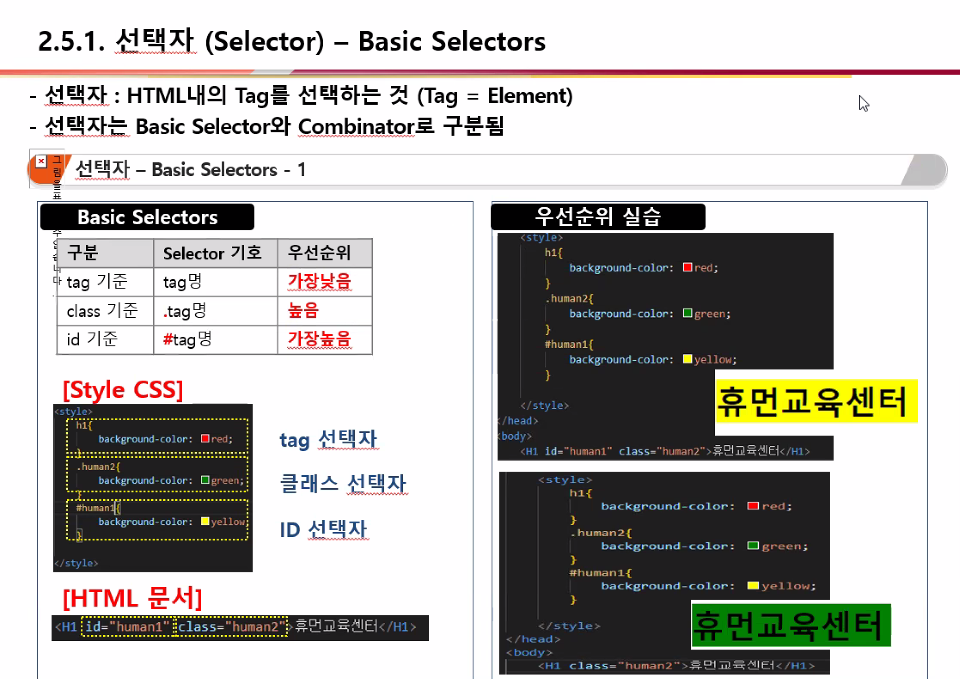
선택자 (Selector)
스타일 적용에 관한 우선순위를 결정한다
tag 기준
- tag명 = 가장 낮음
class 기준
- .tag명 = 높은
id 기준
- #tag명 = 가장 높음
- 우선순위
- ID > 속성[id] > 속성[class] > class > tag
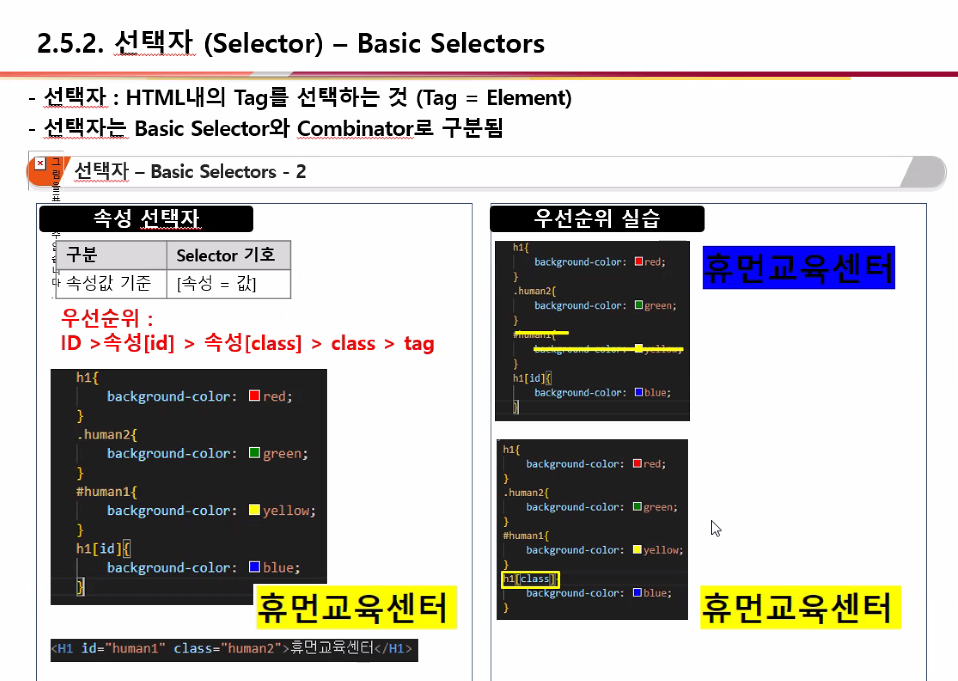
- 선택자 : HTML내의 Tag를 선택하는 것 (Tag = Element)
- 선택자는 Basic Selector와 Combinator로 구분됨.
- 자손 : ul li
- 자식 : ul>li
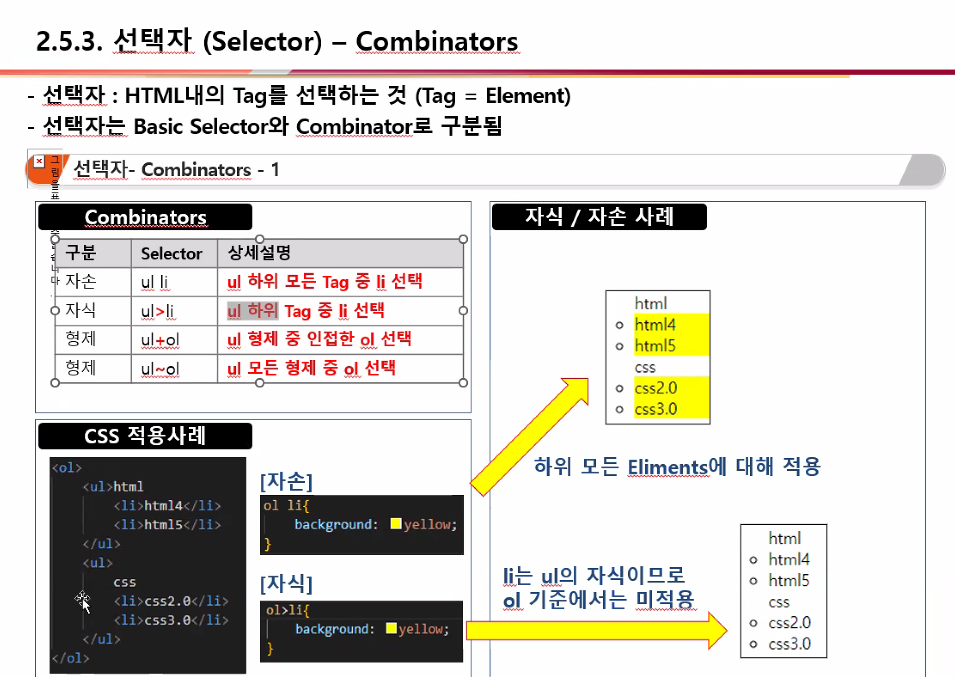
- 형제
- ol + ul
- ol 다음에 있는 태그를 대상으로 적용 = ol’s next
1 |
|
Color
- 프론트엔드에서 중요한 것은 색이다.
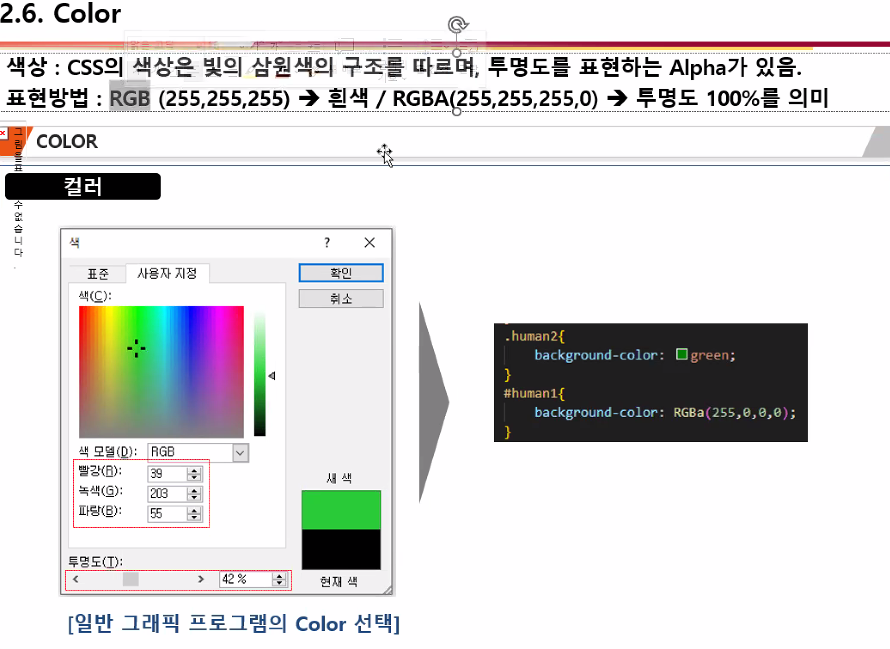
- 다음 코드와 같이 rgb값을 조절해 색을 나타낼 수 있다.
1 | background-color: rgba(170, 125, 228, 0.288); |
박스
- Contents가 차지하는 위치의 표현방법
- padding = contents와 border 간의 여백
- border = 경계선
- margin = 이웃 엘리먼트간의 경계
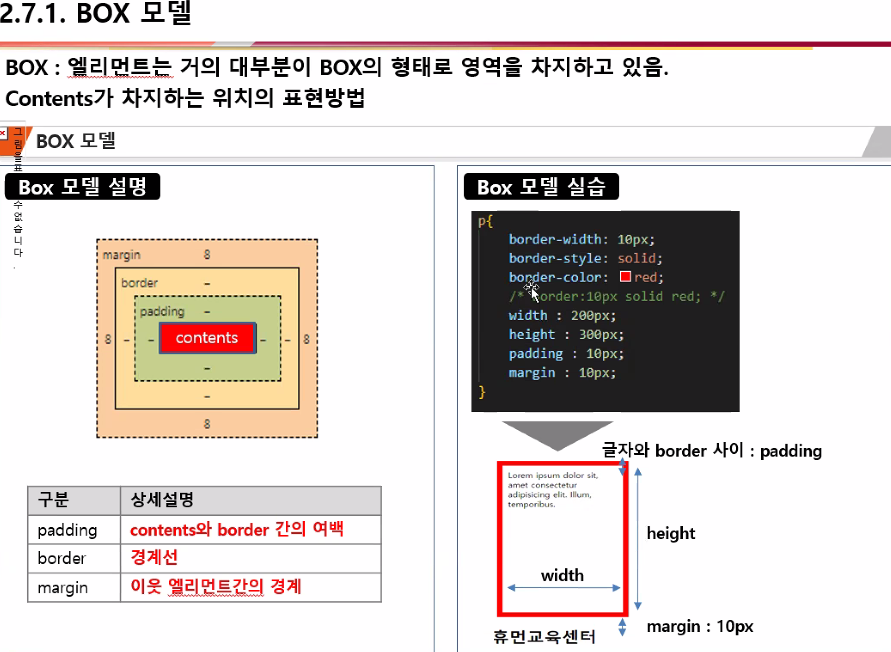
- 다음과 같이 코딩해보자
- padding = 여백 설정
1 |
|
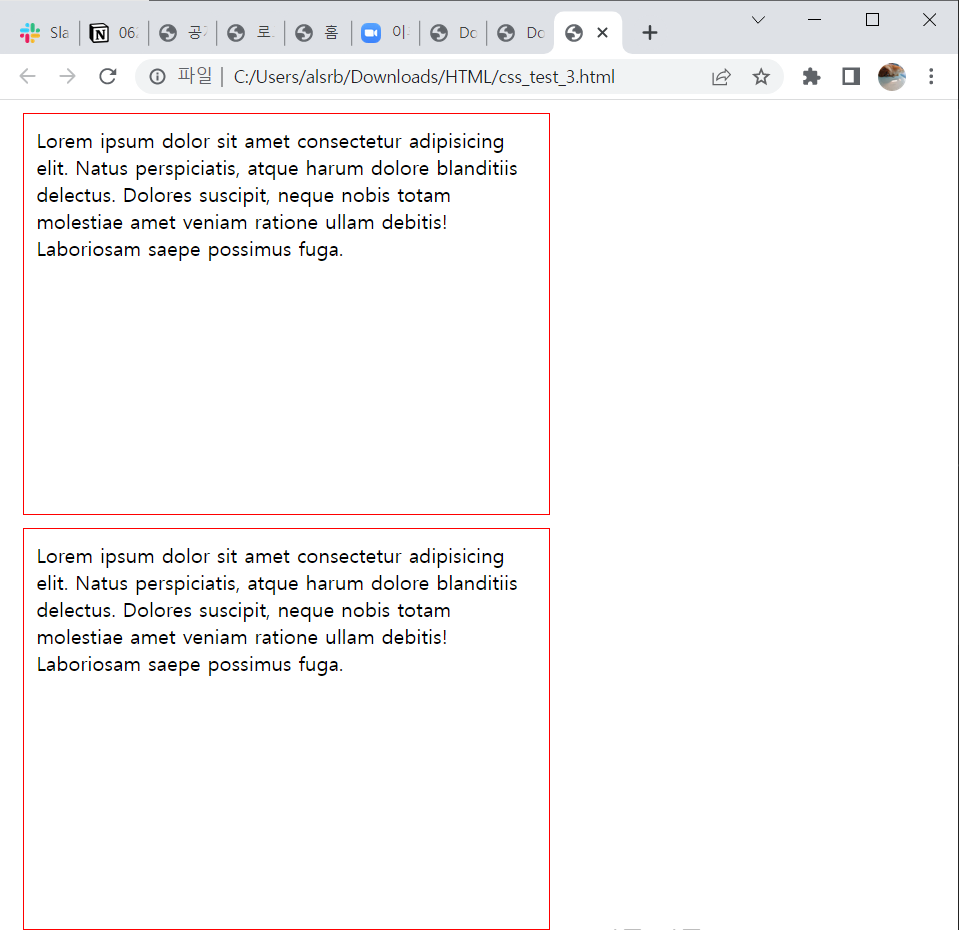
- 다음과 같이 box 적용된다
Box 모델 주의사항
- 마진겹침
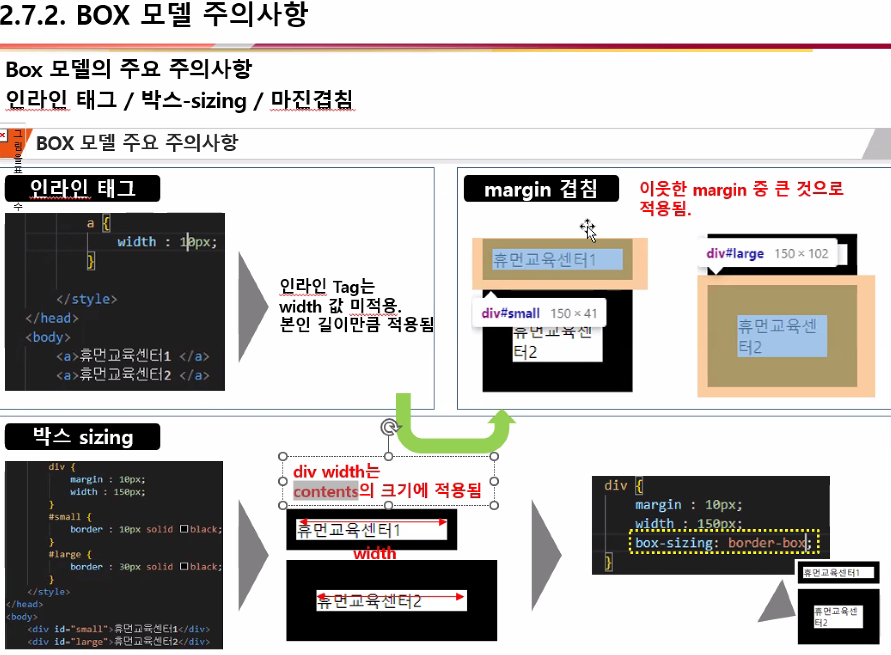
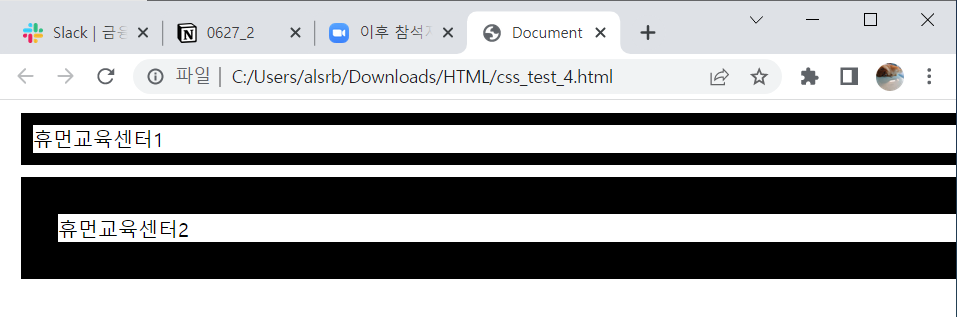
- 다음 코드를 작성해보자
1 |
|
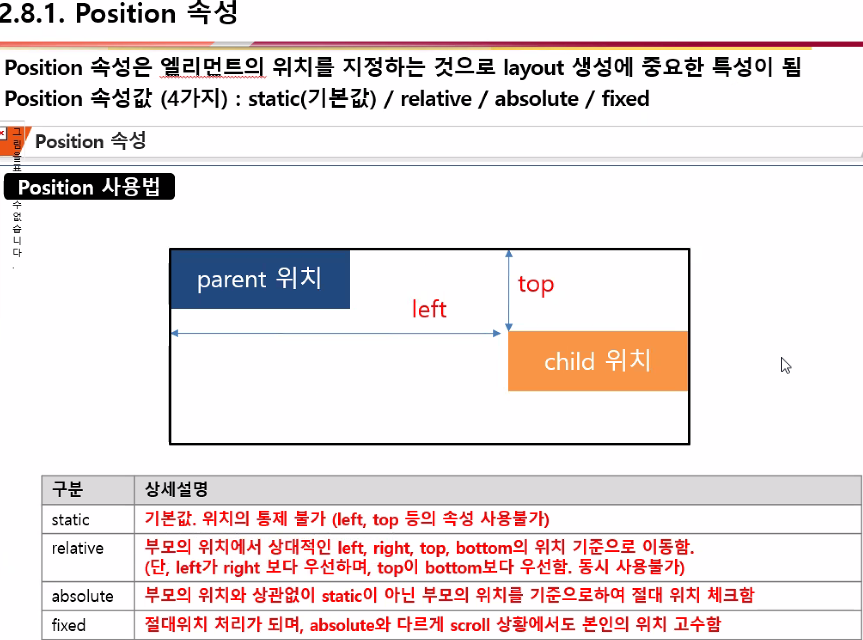
Position
- 위치 조정 가능

- relative를 사용하면 다음과 같다
1 |
|
- static과 달리 child 가 밖으로 나간다

- static
- relative
- absolute
- fixed
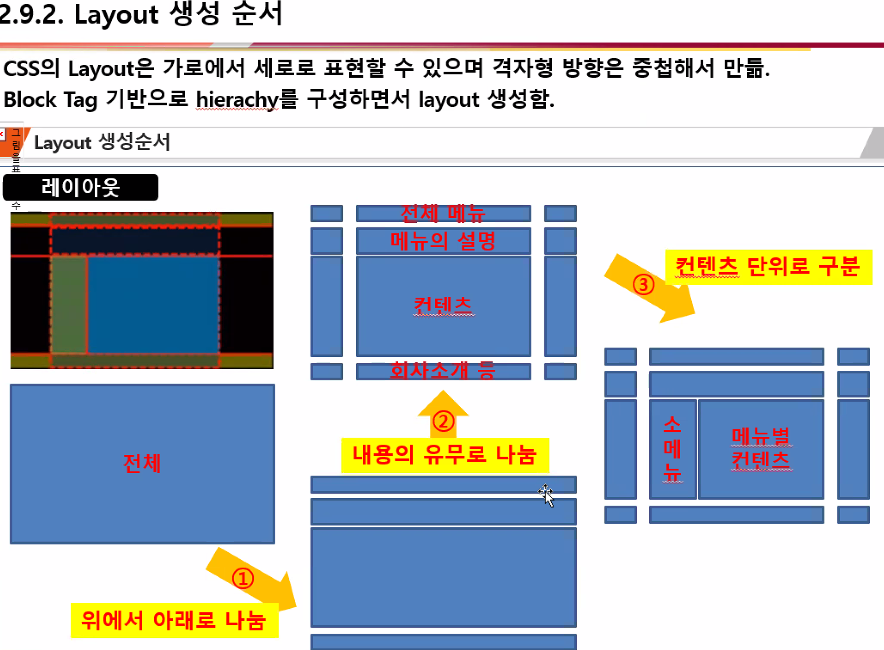
레이아웃
- layout 생성 순서
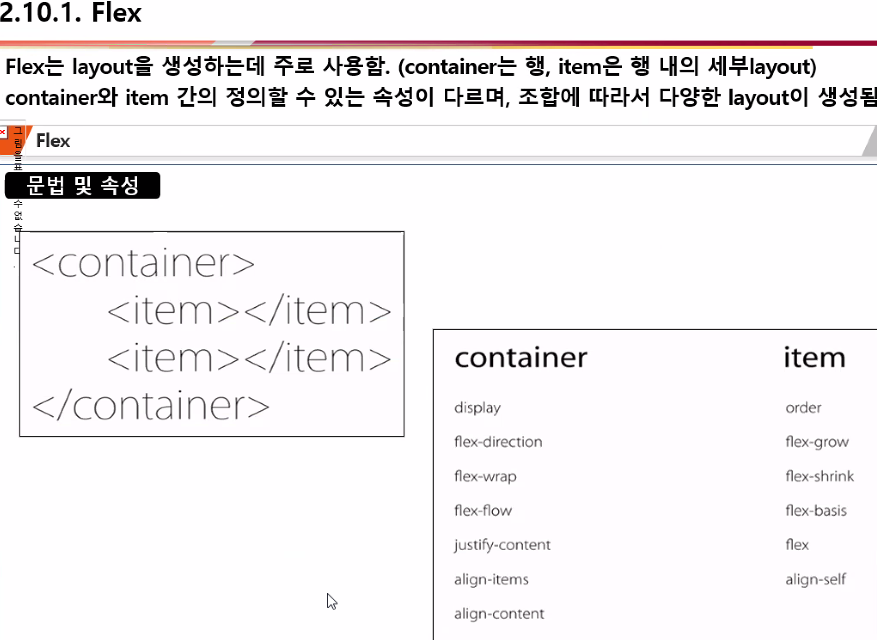
플랙스
- layout 생성에 사용한다
- Container = 행
- item = 행 내의 세부 layout
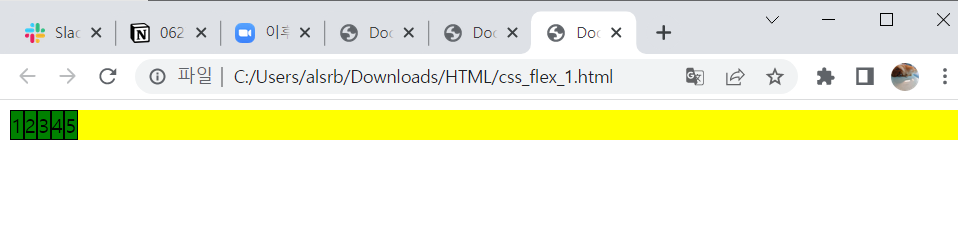
- flex를 사용해본다.
1 |
|
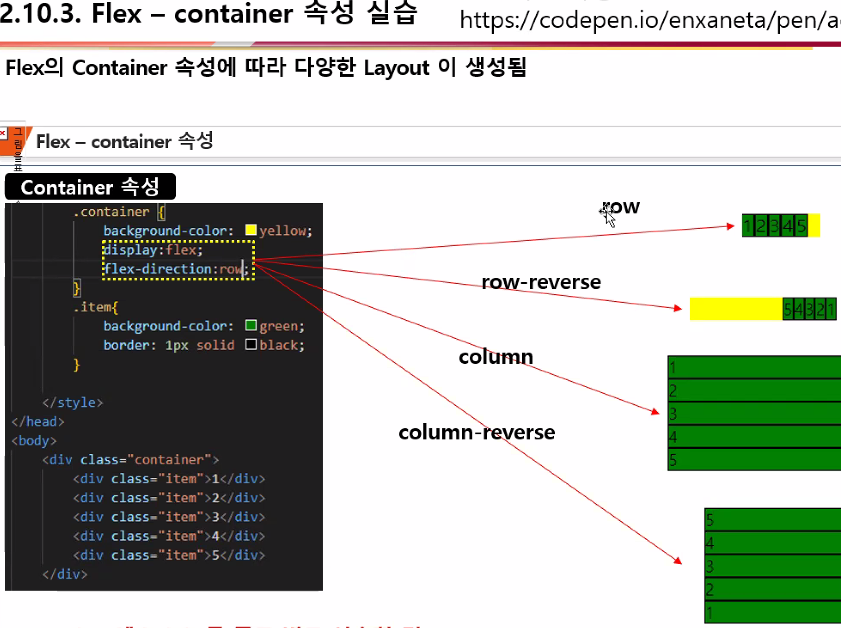
- row 속성 사용 : 행 방향으로 전개된다
- 여러 속성을 사용해보자
- 참고 자료
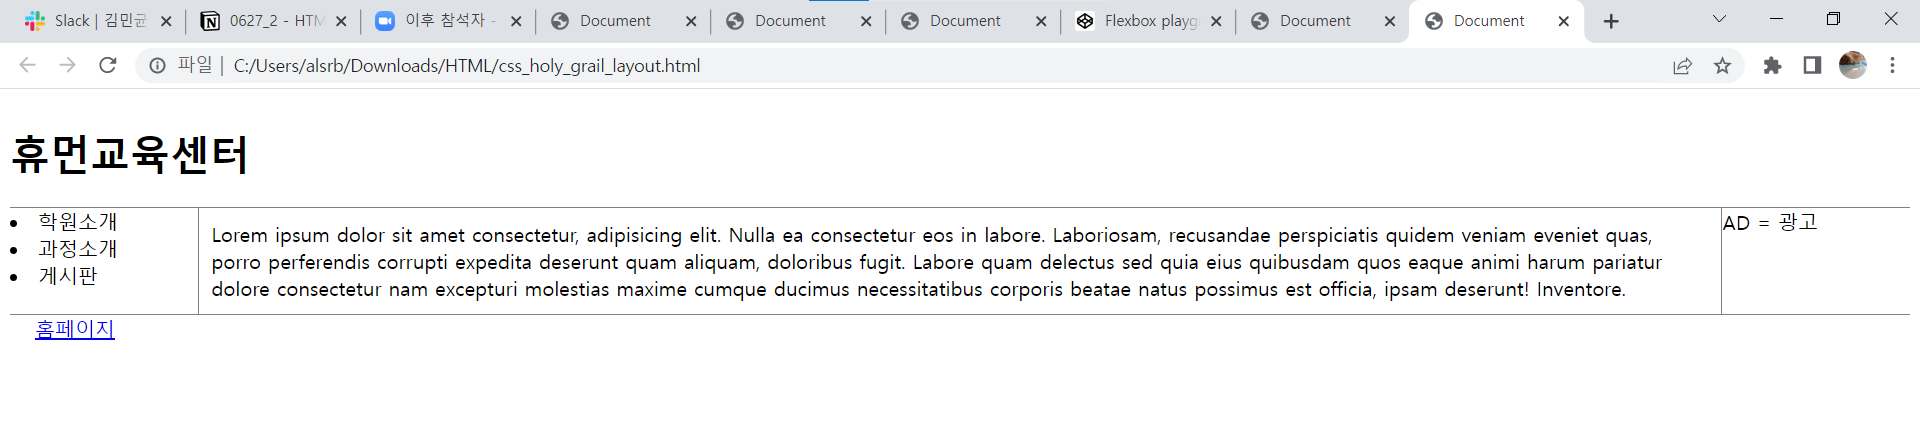
Holy Grail Layout
- 다음과 같이 구성하는 layout이다
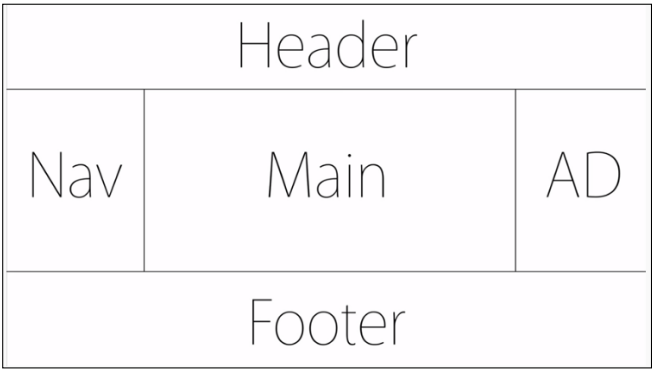
- 직접 사용해보자
1 |
|
- 결과는 다음과 같다
html & css 기초 되집기
You need to set
install_url to use ShareThis. Please set it in _config.yml.