PostgreSQL_with_kakao_chatbot

챗봇 평점 남기기 기능 구현

  • 평가 점수를 입력받아 DB에 기록하고 평균 통계를 계산한다.

  • 단, 1사람당 1번씩만 평점 남기기가 가능하며 두 번째부터는 가장 최근 점수로 갱신된다.

  • 알고리즘

    • id 검색 후, 없을 경우 평가를 기록 = INSERT
    • id 검색 후, 있을 경우 평가를 갱신 = UPDATE
  • 코드 작성

1
2
3
4
5
6
7
8
9
10
11
12
13
14
15
16
17
18
19
20
21
22
23
24
25
26
27
28
29
30
31
32
33
34
35
36
37
38
39
40
import psycopg2
from datetime import datetime

passwd = '5280c3caeed8c1cb512f19d6fc238a6ab642556e69c3050ddfe232c4c4372d0e'
db = psycopg2.connect(host='ec2-3-234-131-8.compute-1.amazonaws.com', dbname='ec2-3-234-131-8.compute-1.amazonaws.com',user='ndurbfpbebgdrc',password= passwd,port=5432)
cur=db.cursor()

# 날짜, id, 점수
date_data = datetime.today().strftime('%Y-%m-%d')
id_data = "'ww'"
idid_data = 'ww'
score_data = '2'

# SELECT문 - id로 검색하여 조회
cur.execute("SELECT * FROM score WHERE id=%s;" % (id_data))
rows = cur.fetchall()
print(rows)
print(type(rows))

# rows 길이 = 0
# 해당 id가 남긴 기록이 없음 = 첫 평가
# 점수를 포함한 데이터를 INSERT
if len(rows) == 0:
cur.execute("INSERT INTO score (date, id, score) VALUES (%s, %s, %s);"
, (datetime.today().strftime('%Y-%m-%d'), idid_data, score_data) )

# rows 길이 != 0
# 해당 id가 남긴 기록이 있음 = 최소 두 번째 평가
# 기존에 남긴 점수를 새로 UPDATE
else :
cur.execute("UPDATE score SET date=%s, score=%s WHERE id=%s;"
, (datetime.today().strftime('%Y-%m-%d'),score_data, idid_data) )

# cur.execute("SELECT * FROM score WHERE id=%s;" % (id_data))
# rows = cur.fetchall()
# print(rows)
# print(type(rows))

# POSTGRESQL DB에 COMMIT 하기
# db.commit()
  • 챗봇 스킬로 사용 가능하도록 형식을 맞추어 다시 작성
1
2
3
4
5
6
7
8
9
10
11
12
13
14
15
16
17
18
19
20
21
22
23
24
25
26
27
28
29
30
31
32
33
34
35
36
37
38
# # db에 점수추가
@app.route('/api/dbinsert', methods=['POST'])
def dbinsert():
body = request.get_json() # 사용자가 입력한 데이터

# date_data = datetime.today().strftime('%Y-%m-%d')
id_data = "'%s'" %str(body['userRequest']['user']['id'])
idid_data = '%s' %str(body['userRequest']['user']['id'])
score_data = str(list(body['userRequest']['utterance'])[1])
cur=db.cursor()

cur.execute("SELECT * FROM score WHERE id=%s;" % (id_data))
rows = cur.fetchall()

if len(rows) == 0:
cur.execute("INSERT INTO score (date, id, score) VALUES (%s, %s, %s);"
, (datetime.today().strftime('%Y-%m-%d'), idid_data, score_data) )

else :
cur.execute("UPDATE score SET date=%s, score=%s WHERE id=%s;"
, (datetime.today().strftime('%Y-%m-%d'),score_data, idid_data) )

db.commit()

responseBody = {
"version": "2.0",
"template": {
"outputs": [
{
"simpleText": {
"text": "점수가 반영되었습니다.\n감사합니다."
}
}
]
}
}

return responseBody
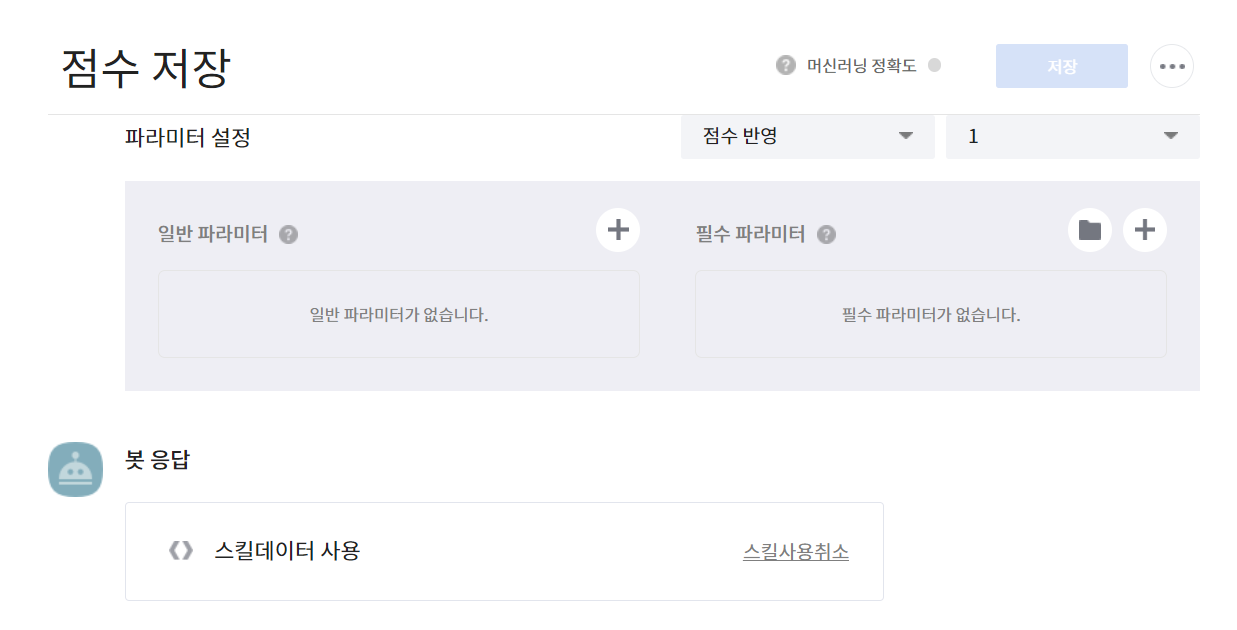
  • 블록 제작
  • 별점 버튼을 점수 저장할 블록으로 연결

Untitled

  • 스킬 만들고 적용하기

Untitled

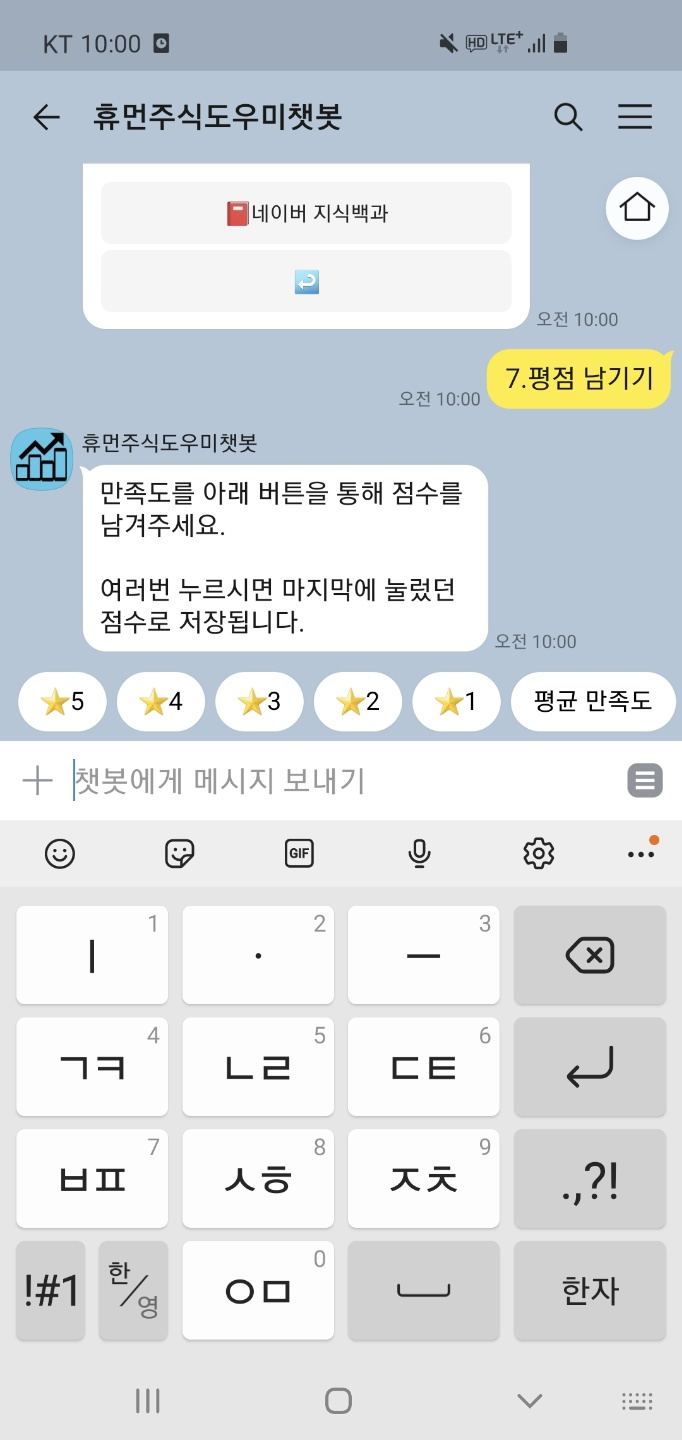
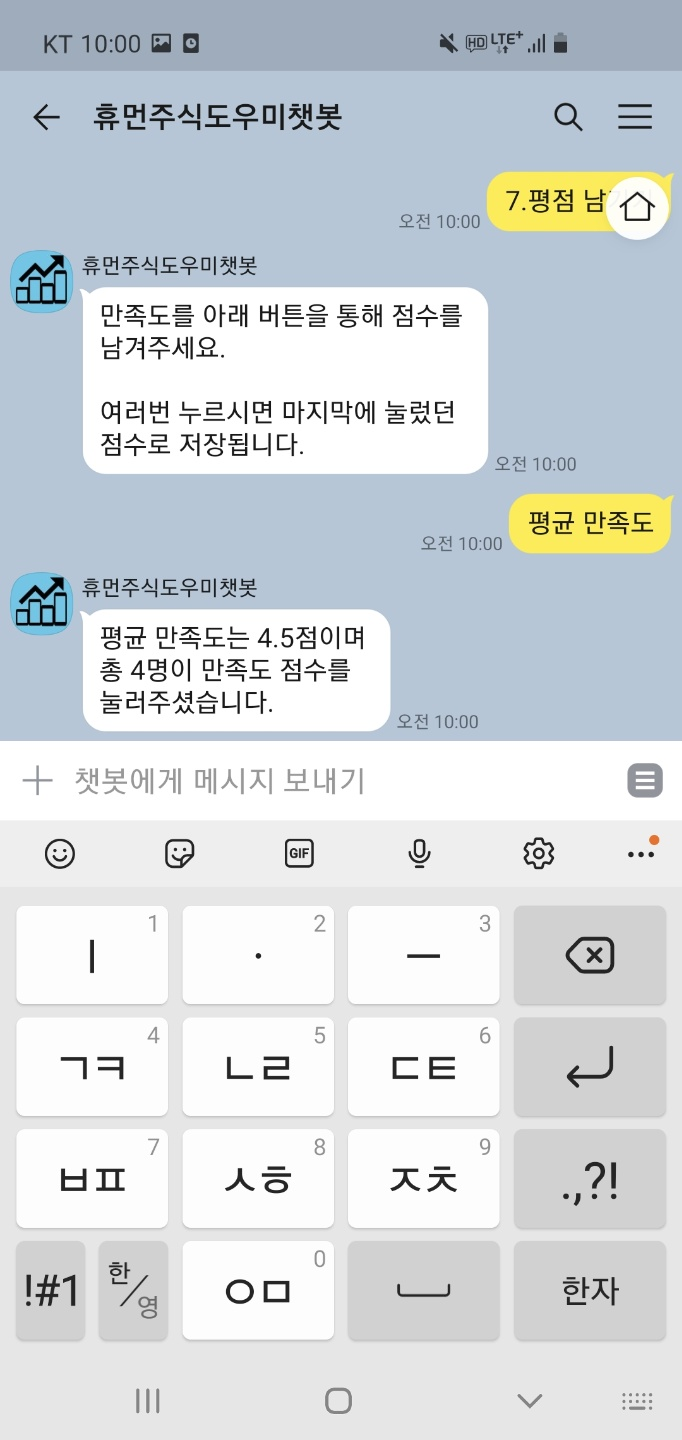
  • 실행 결과

Untitled

Untitled

PostgreSQL_on_Heroku

헤로쿠에서 PostgreSQL 사용하기

heroku에서 postgresql 설치

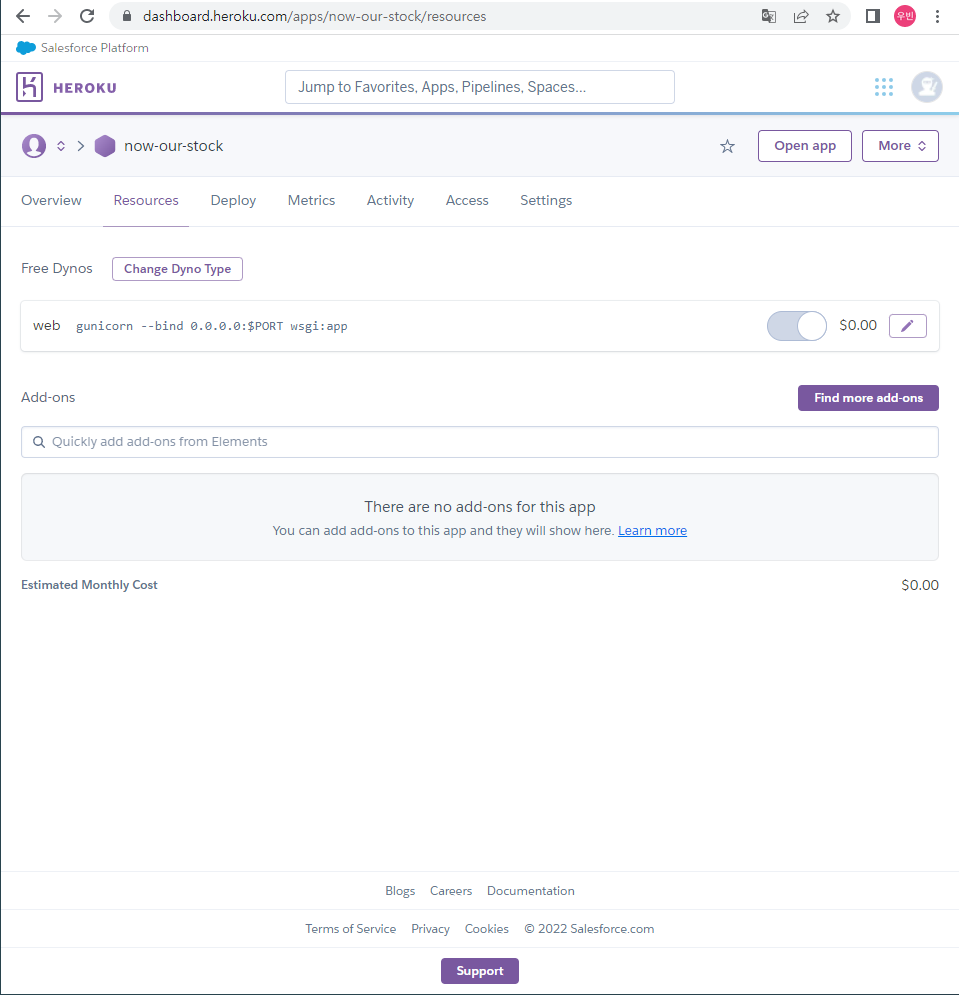
  • 내 홈페이지의 Resources로 들어가기

Untitled

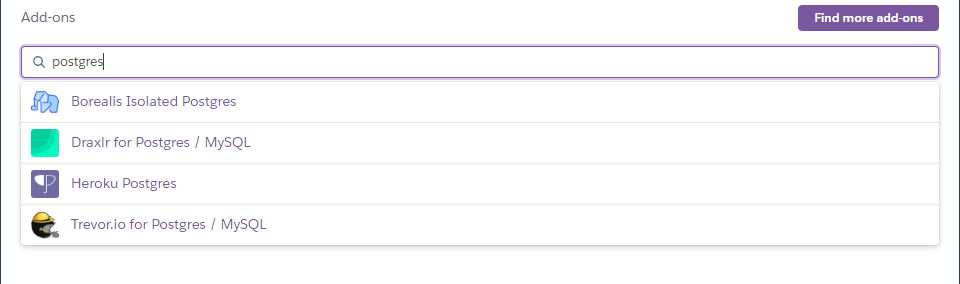
  • Add-ons 에 postgres 검색

Untitled

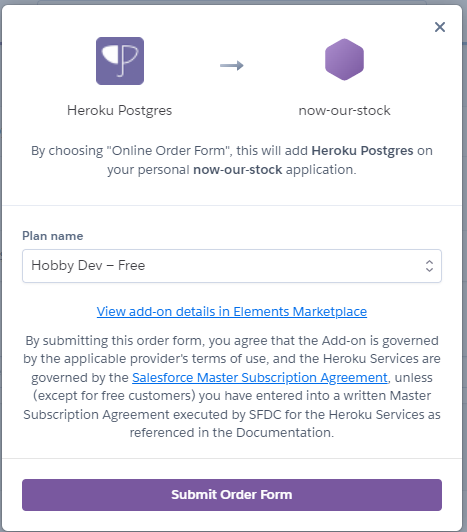
  • Heroku Postgres설치를 위해 Submit Order Form 클릭
    Untitled

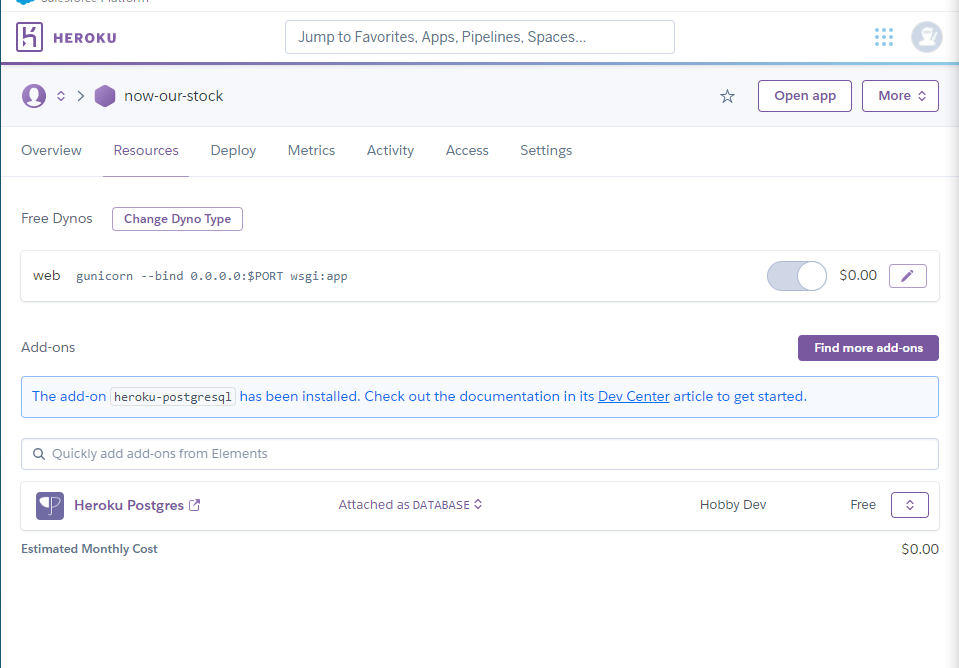
  • Heroku Postgres 클릭

    Untitled

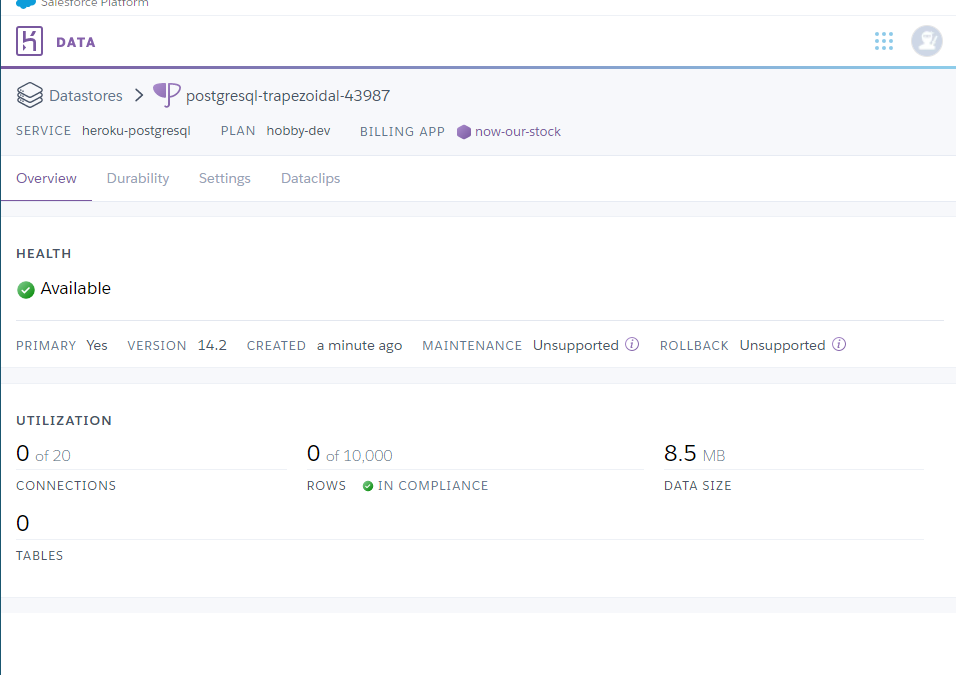
  • 하면 현재 사용중인 DB현황을 볼 수 있다.

Untitled

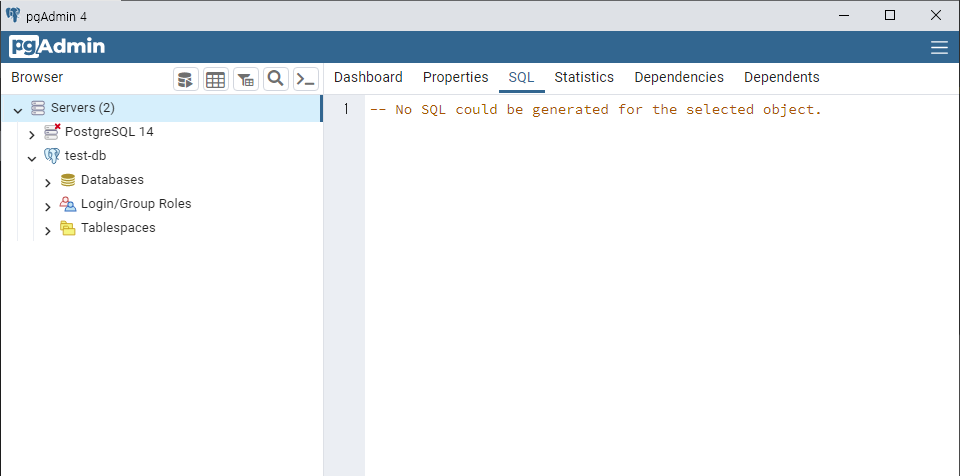
pgAdmin에서 heroku 와 연동

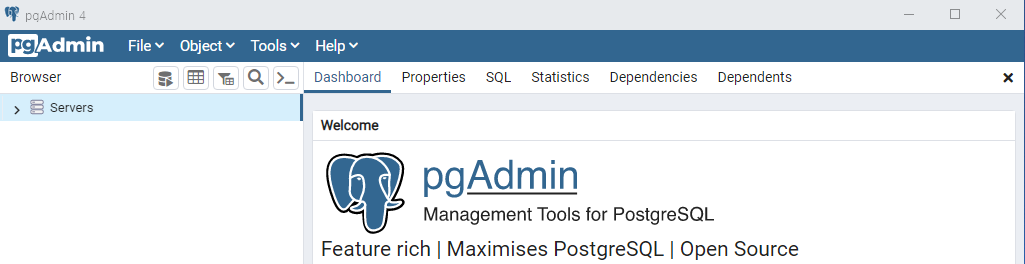
  • pgAdmin 실행
    • 중간에 문제가 생긴다면ubuntu에서 service start를 해볼것

→sudo service postgresql status

→sudo service postgresql start

사용자 계정 Password 설정

  • 기본적으로 admin 사용자로 등록이 되어 있다. 보통 DB 초기 세팅 시에는 패스워드를 입력받아야 한다. ( password : 2016***** )

→sudo passwd postgres

Untitled

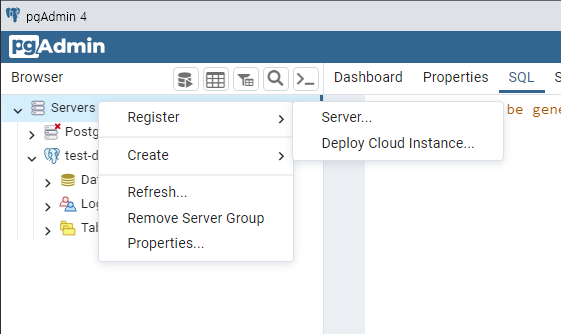
  • Servers(우클릭) → Register → Server… → 클릭

Untitled

Untitled

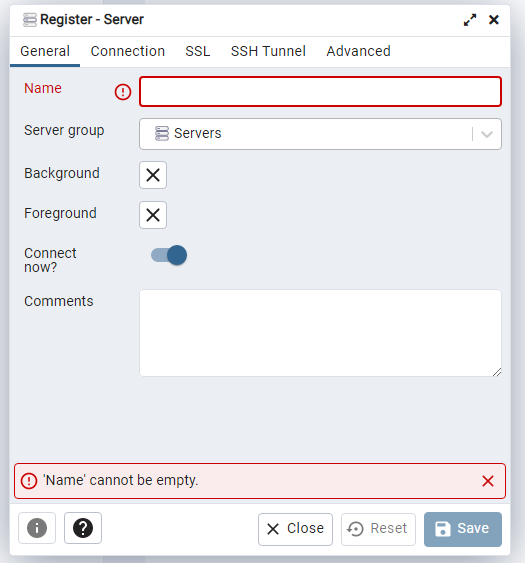
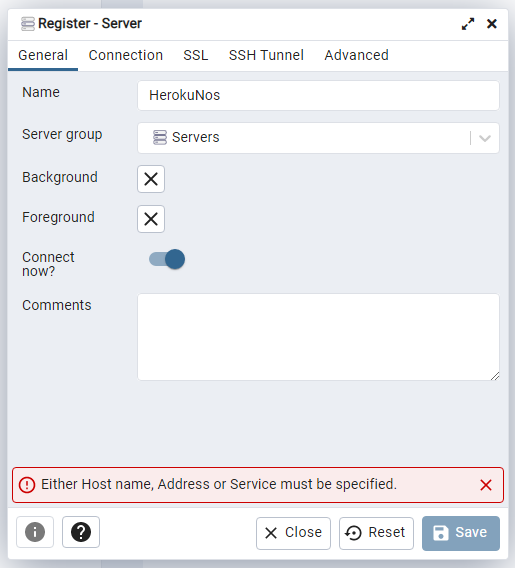
  • General 탭의 Name 작성해주기

Untitled

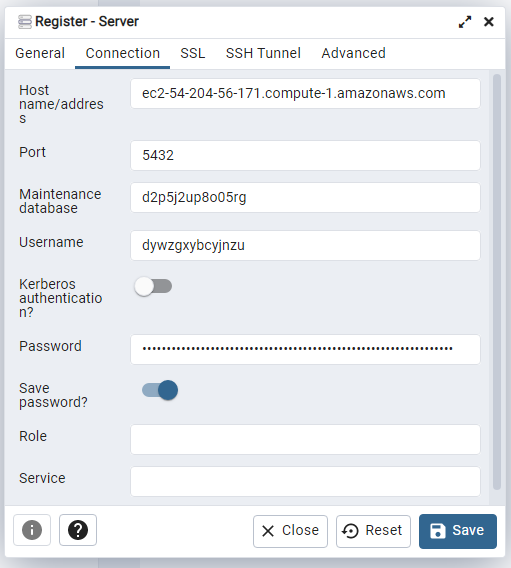
  • Connection탭의 주소 작성해주기

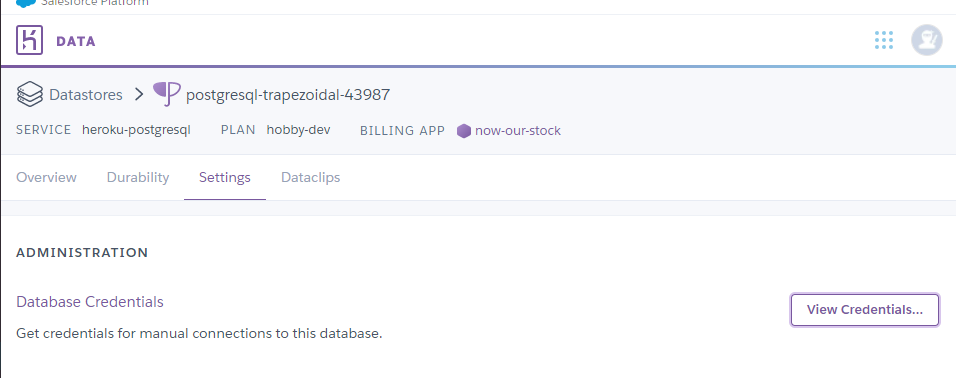
    • Heroku 홈페이지의 Datastores → Settings → View CreDentials… 클릭

      Untitled

      ——> 양식에 맞춰 작성해주기

      Untitled

      ——> Save 클릭

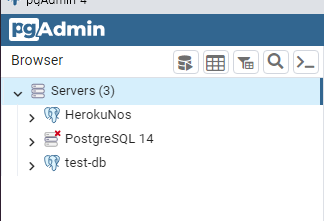
  • 서버가 추가된것을 확인

Untitled

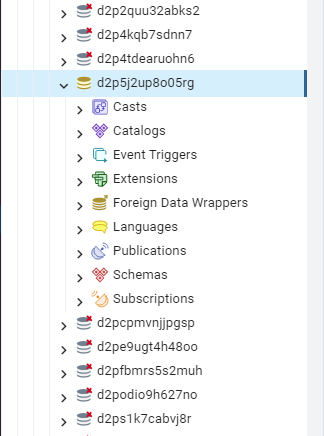
  • Heroku에서 대여해준 DataBase들 목록중에서 나의 DB를 찾아야함.

Untitled

Python으로 db에 데이터 입력하기

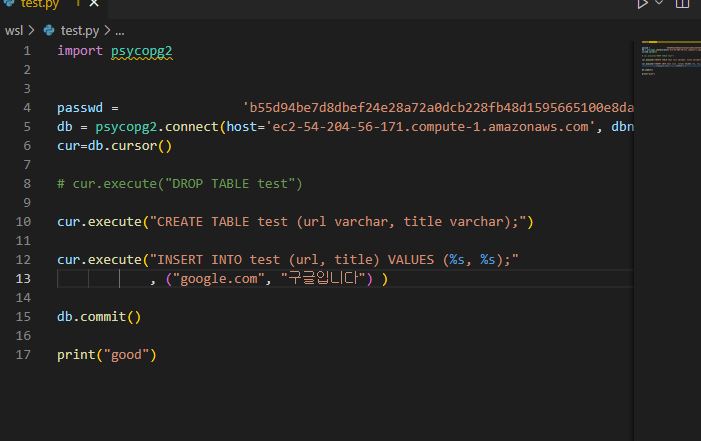
  • 테이블을 생성하고 데이터를 입력하는 python 코드 작성 후 실행

Untitled

Untitled

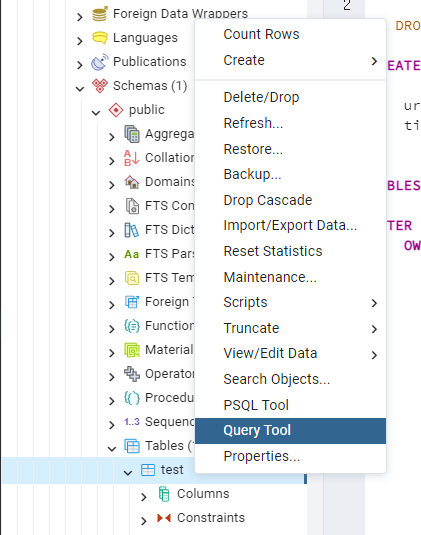
  • pgAdmin에서 확인

    • Query Tool 실행

    Untitled

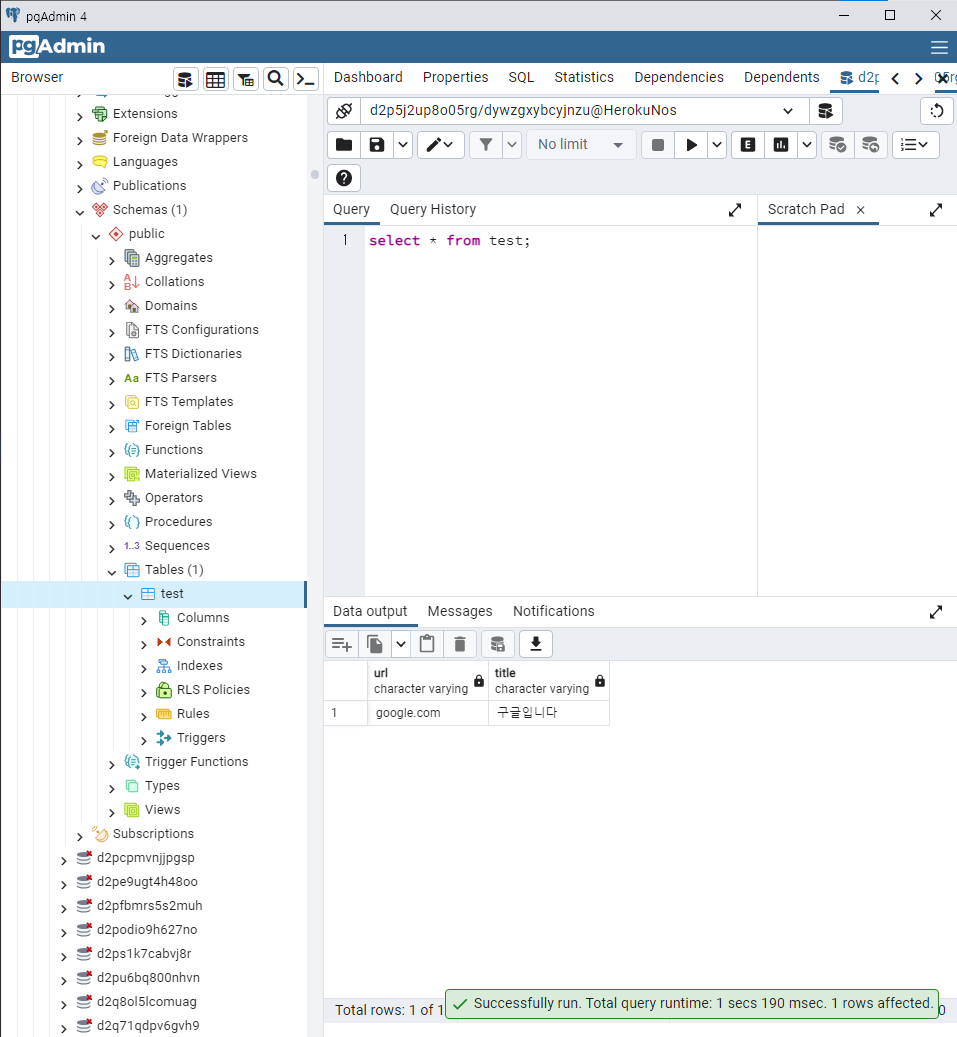
    • test 테이블을 확인하는 쿼리 작성 후 실행

      Untitled

      ——> 성공!

python에서 db쿼리가 잘 작동하는지 확인

  • psycopg2 설치
1
pip3 install psycopg2-binary
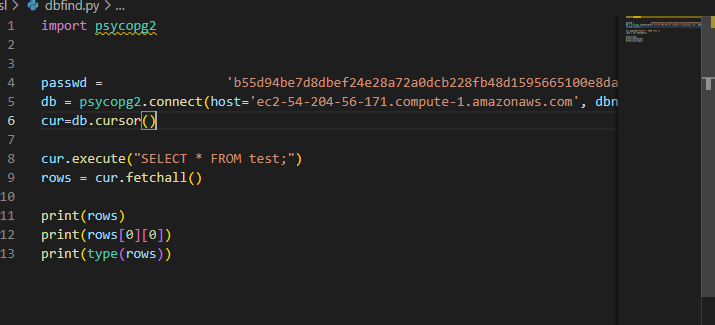
  • 파이썬에서 test 테이블을 조회하는 코드를 작성 후 실행
  • python3 명령어로 실행

Untitled

Untitled

——> 성공!

최종 코드

1
2
3
4
5
6
7
8
9
10
11
12
13
14
15
16
17
18
# # 테이블 생성 + 데이터 집어넣기

import psycopg2

passwd = ''
db = psycopg2.connect(host='ec2-54-204-56-171.compute-1.amazonaws.com', dbname='d2p5j2up8o05rg',user='dywzgxybcyjnzu',password= passwd,port=5432)
cur=db.cursor()

# cur.execute("DROP TABLE test")

cur.execute("CREATE TABLE test (url varchar, title varchar);")

cur.execute("INSERT INTO test (url, title) VALUES (%s, %s);"
, ("google.com", "구글입니다") )

db.commit()

print("good")
1
2
3
4
5
6
7
8
9
10
11
12
13
14
# # 테이블 조회하기

import psycopg2

passwd = ''
db = psycopg2.connect(host='ec2-54-204-56-171.compute-1.amazonaws.com', dbname='d2p5j2up8o05rg',user='dywzgxybcyjnzu',password= passwd,port=5432)
cur=db.cursor()

cur.execute("SELECT * FROM test;")
rows = cur.fetchall()

print(rows)
print(rows[0][0])
print(type(rows))

PSQL practice 02

  • 실무 예제로 배우는 데이터 공학 72p

  • 파일 생성, 가상 환경 진입

관리자 권한으로 실행 : Ubuntu

→ cd ..→ cd ..→ cd mnt/c

→ mkdir sql

→ cd sql

→ virtualenv venv

→ source venv/bin/activate

  • 라이브러리 설치

→ pip3 install psycopg2-binary pandas faker

→ pip3 install pandas

→ pip3 install numpy

  • 실무 예제로 배우는 데이터 공학 72p 실습 진행

→ mkdir chapter04

→ cd chapter04/

→ 파일 생성 : vi createrecord.py

→ 내용 작성

1
2
3
4
5
6
7
import numpy as np
import pandas as pd
import psycopg2

print(np.__version__)
print(pd.__version__)
print(psycopg2.__version__)

→ 저장 후 코드 실행 : 버전 확인

→ python3 createrecord.py

→ 버전이 출력되면 성공

  • 서비스 활성화

→sudo service postgresql status

→sudo service postgresql stop

→sudo service postgresql start

→ createrecord.py에 다음 내용을 추가한다.

1
2
3
4
5
6
import psycopg2 as db
conn_string="dbname='dataengineering' host='localhost' user='postgres' password='postgres'"
# 집 pc에서는 201610974
conn=db.connect(conn_string)
cur=conn.cursor()
print("Connected:", cur)

→ 저장 후 실행

→ python3 createrecord.py

→ Connected : cursor…. 가 출력되면 성공.

  • pgAdmin에서 실습 진행

→ 관리자 권한으로 실행 : pgAdmin

→ 로그인 비밀번호 : 201610974

test 서버 비밀번호 : postgres

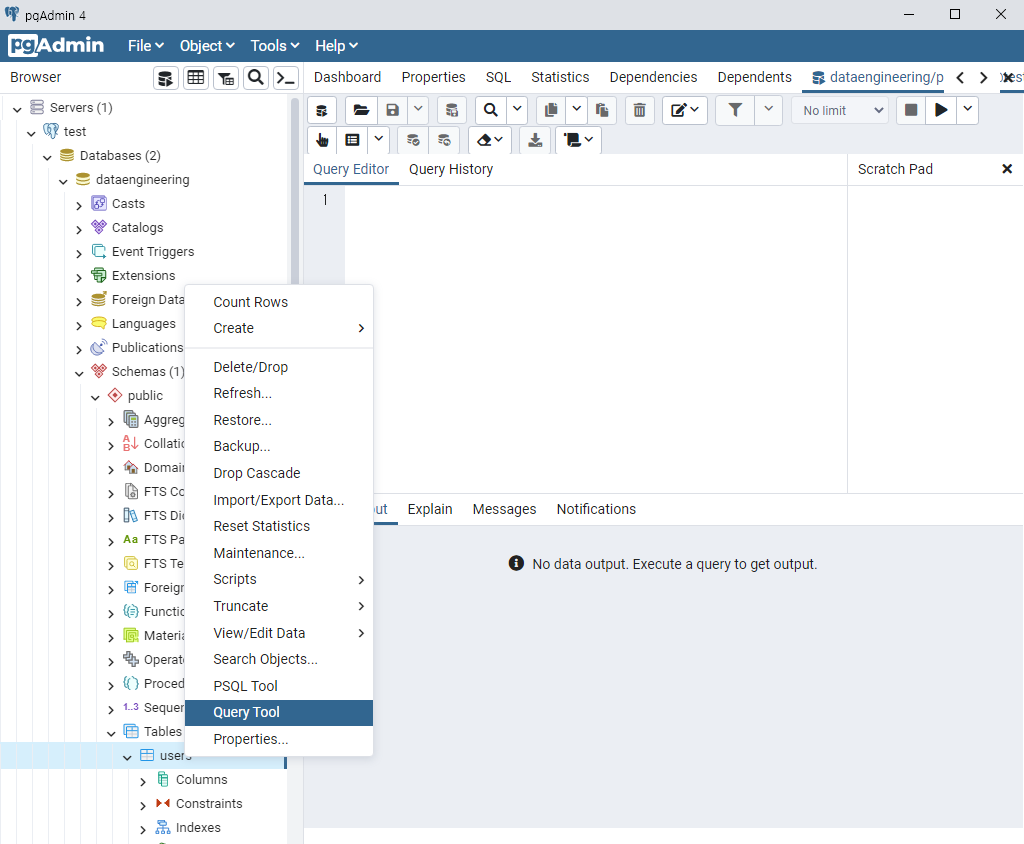
→ dataengineering → Schema → public → Tables → users우클릭

→ querytool

Untitled

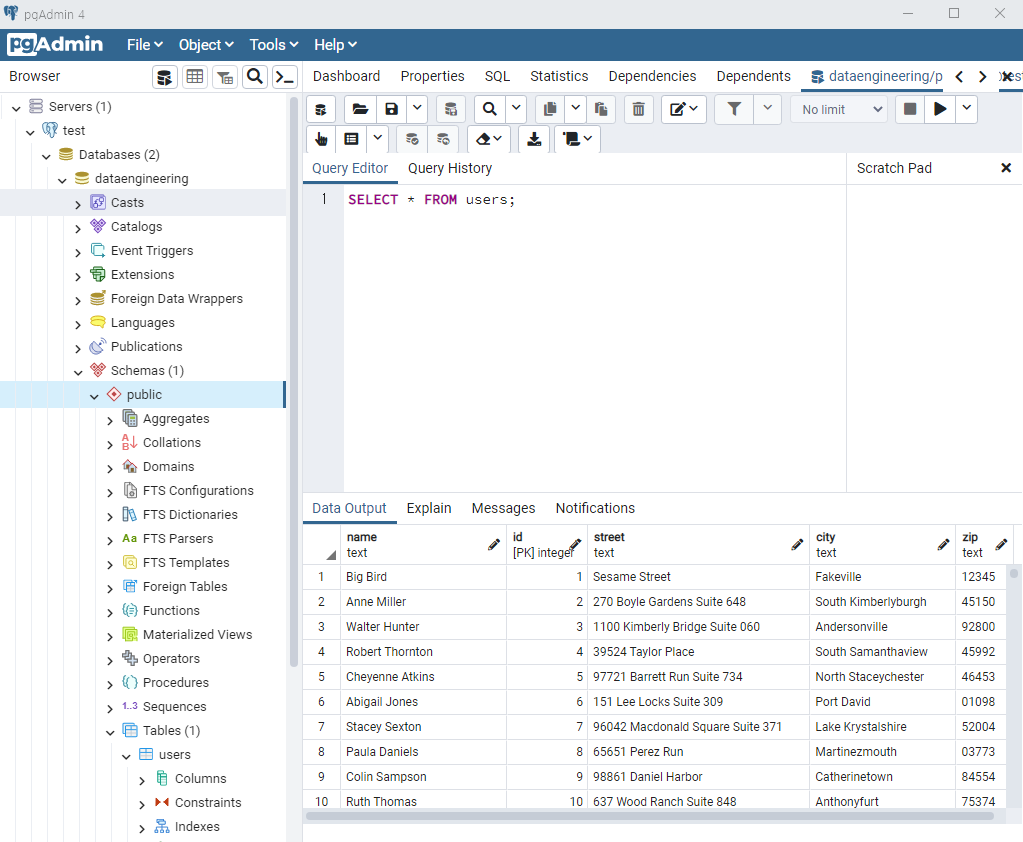
→ 내용 작성 : SELECT * FROM public.users;

→ F5 키로 실행한다.

→ 다음과 같은 결과가 나온다.

Untitled

  • 실무 예제로 배우는 데이터 공학 77p
  • 데이터 추출
  • Ubuntu에서 진행

→ createrecord.py에 다음 내용을 추가한다.

1
2
3
4
5
6
# 데이터 추출 예제
print("step 2: ----- select -----")
query = "select * from users"
cur.execute(query)
for record in cur:
print(record)

→ 저장 후 실행

→ python3 createrecord.py

→ createrecord.py에 다음 내용을 추가한다.

#print("step is done!") print(cur.fetchall()) print("--------------") print(cur.fetchmany(3)) print("--------------") print(cur.fetchone()) print("----") print(cur.rowcount)

→ 저장 후 실행

→ python3 createrecord.py

→ createrecord.py에 다음 내용을 추가한다.

1
2
3
4
5
6
# 78페이지 8번.
conn = db.connect(conn_string)
cur = conn.cursor()
f = open('fromdb.csv', 'w')
cur.copy_to(f, 'users', sep=',')
f.close()

→ 저장 후 실행

→ python3 createrecord.py

→ ls

→ fromdb.csv 파일이 생성되면 성공

→ createrecord.py에 다음 내용을 추가한다.

#78p 11번

f = open('fromdb.csv', 'r') f.read() print("reading data is done!")

→ 저장 후 실행

→ python3 createrecord.py

  • 새 폴더 생성

→ 폴더 생성 : vi querydf.py

→ 내용 작성

import psycopg2 as db import pandas as pd conn_string="dbname='dataengineering' host='localhost' user='postgres' password='postgres'" conn=db.connect(conn_string)

df = pd.read_sql("select * from users", conn) print(df.head())

→ 저장 후 실행

→ python3 querydf.py

  • Reference : 실무 예제로 배우는 데이터 공학

PSQL practice 01

  • pgAdmin은 GUI 툴 (있으나 없으나 상관이 없음)

  • sudo service postgresql start

    DB(형광등)—> 쿼리

             —> Select, insert, ...
    
        —> 형광등 켜야 불이 들어오듯 필수적이다.
    

실습

  • 실무 예제로 배우는 데이터 공학 72p부터 따라한다.

VSCord 에서 Ubuntu Terminal 열기

→ 폴더 생성 : chapter04

→ 파일 생성 : step01_createdf.py

→ 내용 작성

import psycopg2 as db

# 호스트, 데이터베이스 이름, 사용자 이름, 패스워드

conn_string = "dbname='dataengineering' host = 'localhost' user='postgres' password='postgres'"

#집pc의 경우에는 password='201610974‘

conn = db.connect(conn_string)

cur = conn.cursor()

print("db connecting....")

print(cur)

( 아이디/ 비밀번호 모두 postgres인 듯하다)

→ 저장

→ cd .. → cd .. → cd mnt/c → cd airflow-test → cd chapter04

→ 실행 : python3 step01_createdf.py

→ 다음 내용이 출력되면 성공.

db connecting….
<cursor object at 0x7fa097ba86d0; closed: 0>

→ step01_createdf.py 파일에 다음 내용 추가하고 저장

1
2
3
4
5
6
7
query = "insert into users (id,name,street,city,zip) values({},'{}','{}','{}','{}')".format(1,'Big Bird','Sesame Street','Fakeville','12345')
print(cur.mogrify(query))
query2 = "insert into users (id,name,street,city,zip) values(%s,%s,%s,%s,%s)"
data=(1,'Big Bird','Sesame Street','Fakeville','12345')
print(cur.mogrify(query2,data))
cur.execute(query2,data)
conn.commit()

→ 실행

  • pgAdmin에서 실습 진행

→ 관리자 권한으로 실행 : pgAdmin

→ 비밀번호 : postgres

→ dataengineering 우클릭 → querytool

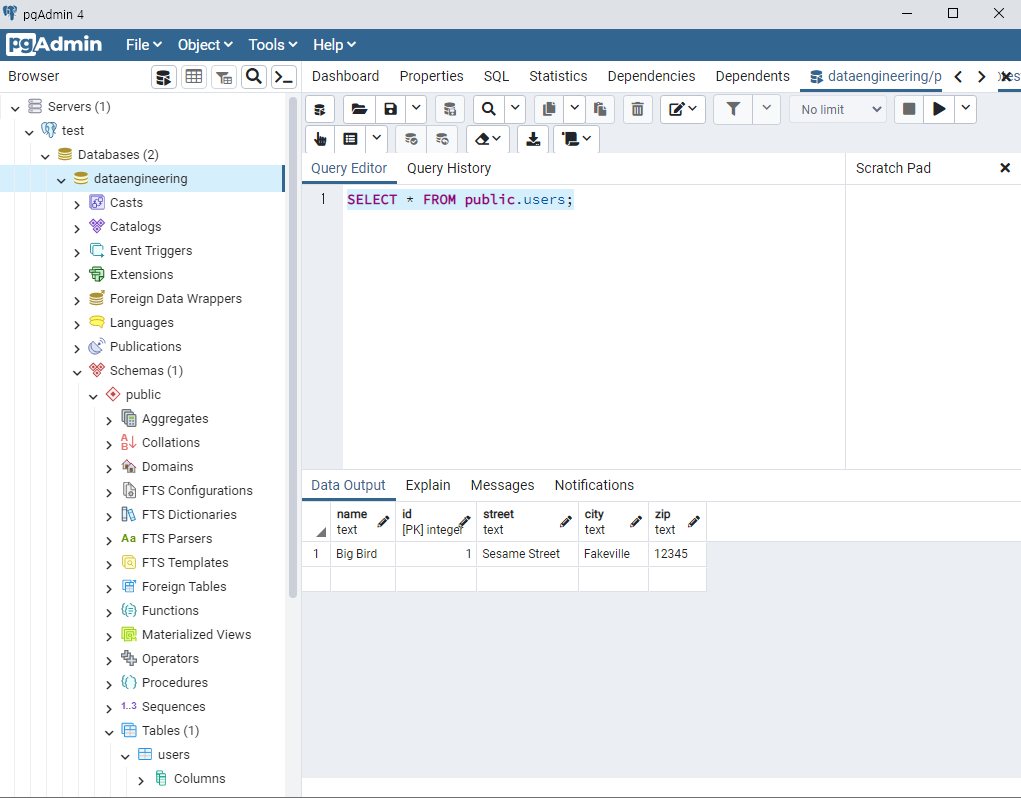
→ 내용 작성 : SELECT * FROM public.users;

→ F5 키로 실행한다.

→ 다음과 같은 결과가 나온다.

Untitled

  • VSCord 에서 새로 파일을 작성한다.

→ 파일 생성 : step02_insertmany.py

→ 내용 작성 ( 실무 예제로 배우는 데이터 공학 75p )

1
2
3
4
5
6
7
8
9
10
11
12
13
14
15
16
17
18
19
20
21
22
23
import psycopg2 as db
from faker import Faker
fake=Faker()
data=[]
i=2
for r in range(1000):
data.append((i,fake.name(),fake.street_address(), fake.city(),fake.zipcode()))
i+=1
data_for_db=tuple(data)
print(data_for_db)
conn_string="dbname='dataengineering' host='localhost' user='postgres' password='postgres'"
# 집pc의 경우에는 password='201610974'

conn=db.connect(conn_string)
cur=conn.cursor()
query = "insert into users (id,name,street,city,zip) values(%s,%s,%s,%s,%s)"
print(cur.mogrify(query,data_for_db[1]))
cur.executemany(query,data_for_db)
conn.commit()
query2 = "select * from users"
cur.execute(query2)
print(cur.fetchall())

→ 저장 후 실행

→ 실행 완료

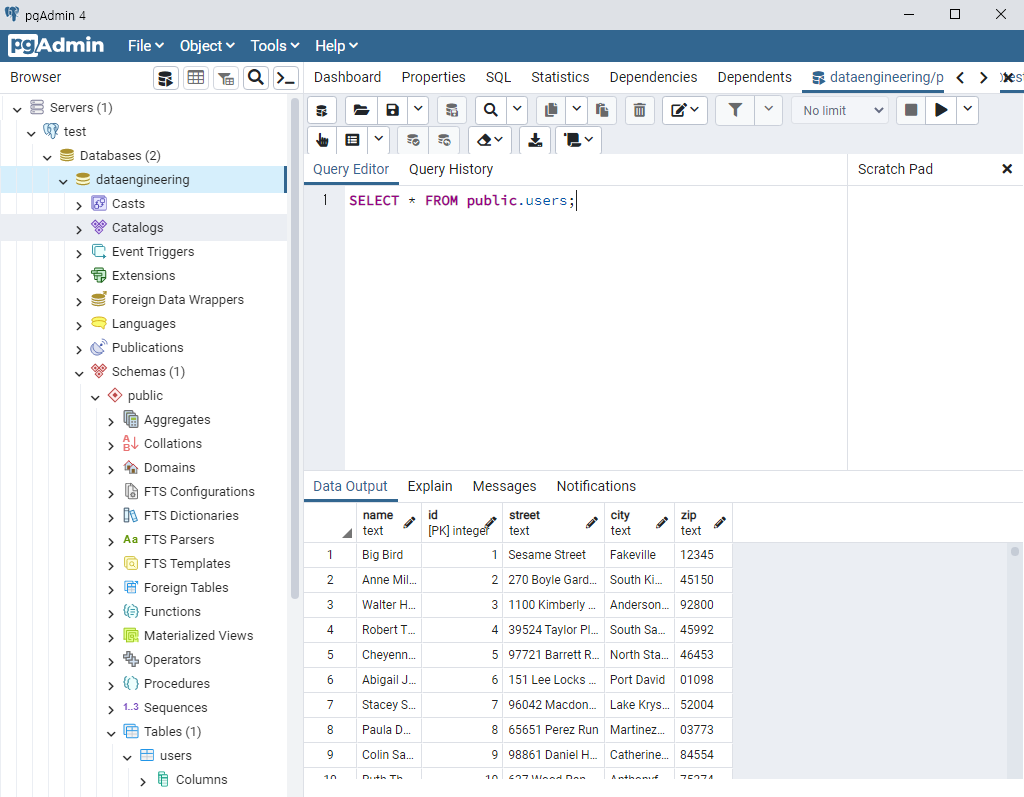
  • pdAdmin 으로 이동

→ F5 키로 다시 실행

→ 다음과 같이 1000개의 데이터가 추가된다.

Untitled

  • Referencd : 실무 예제로 배우는 데이터 공학

PSQL Install

PostgreSQL Installation on WSL2 and Windows

PostgreSQL Installation on WSL2 and Windows - Data Science | DSChloe

(password : 2016*****)

( 서버 password : postgres )

개요

  • WSL2에서 PostgreSQL을 설치한다.
  • pgAdmin은 Windows에 설치한다.

터미널 업그레이드

  • 먼저 WSL 터미널을 열고, Ubuntu 패키지를 모두 업데이트 및 업그레이드를 한다.

Windows Terminal → wsl bash

또는

Ubuntu → ..cd → ..cd

→sudo apt update

→sudo apt-get upgrade

PostgreSQL Installation in WSL2

  • 이번에는 WSL2에서 PostgreSQL을 설치한다. 설치가 종료되면, 반드시 버전을 확인한다.

→sudo apt install postgresql postgresql-contrib

→psql --version

  • 설치 이후에는 Database를 접근 가능하도록 활성화해야 한다.
    • 포트가 활성화 되어 있지 않다면 아래와 같은 메시지가 나타날 것이다.

→sudo service postgresql status

  • 이번에는 활성화를 해보도록 한다. 온라인이라는 메시지가 나타난다면 활성화가 되었다는 것을 의미한다.

→sudo service postgresql start

→sudo service postgresql status

이번에는 활성화된 데이터베이스를 종료시킨다

→sudo service postgresql stop

→sudo service postgresql status

사용자 계정 Password 설정

  • 기본적으로 admin 사용자로 등록이 되어 있다. 보통 DB 초기 세팅 시에는 패스워드를 입력받아야 한다. ( password : 2016***** )

→sudo passwd postgres

• 여기까지 했다면, WSL2에서 추가로 설정할 것은 더 없다.

pgAdmin Installation on Windows

  • 이번에는 pgAdmin을 설치한다. (최신버전 설치, pgAdmin 4 v6.8)웹사이트 : https://www.pgadmin.org/download/pgadmin-4-windows/
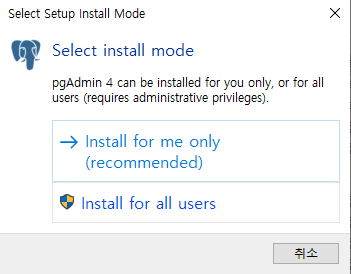
  • 설치 할 때는 관리자로 실행하며, 아래 그림과 나타난다면, install for all users를 선택한다.

Untitled

  • 설치가 완료된 뒤에는 pgAdmin 이 검색되는지를 확인한다.
  • WSL2 에서 PostgreSQL 서비스를 활성화 해야 한다.
  • 처음 실행 시 나타나는 화면에 나오는 Password 설정
  • WSL2에서 설정한 Password를 입력한다. (password : 2016*****)
    • 이번에는 서버를 설정하도록 한다 ( 서버 password : postgres )

Untitled

server 우 클릭

→ register → server

→ 내용 작성

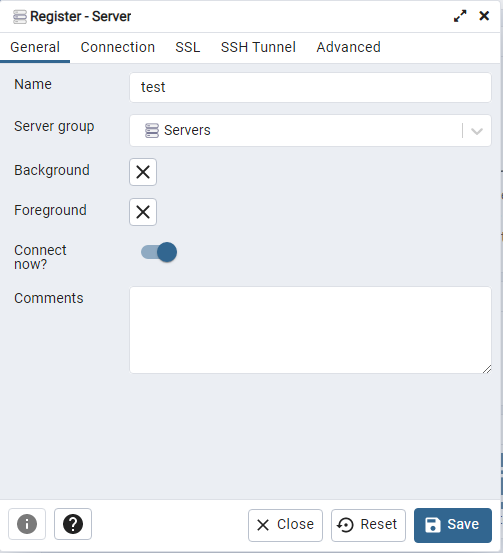
→ General Tab 의 Name에 입력 : test

Untitled

  • connection tab 에서 작성

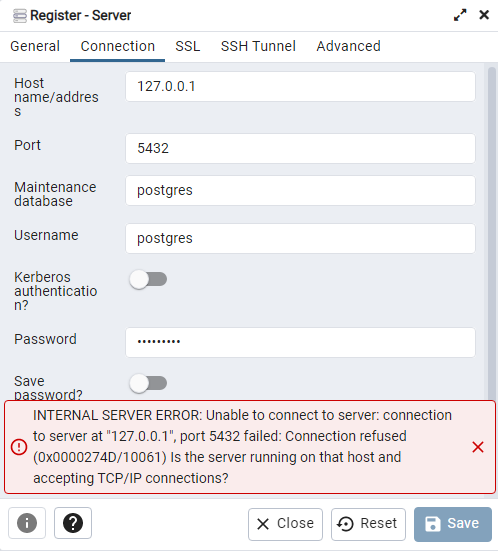
→ host 에 입력 : 127.0.0.1

→ Password는 WSL2에서 입력했던 Password를 입력한다.

Untitled

서비스를 활성화한다.

sudo service postgresql start

다음과 같이 Password를 설정하도록 한다

sudo -u postgres psql -c "ALTER USER postgres PASSWORD '<new-password>';"

sudo -u postgres psql -c "ALTER USER postgres PASSWORD 'postgres';"

  • 위 설정이 끝난 후, 재 접속하면 정상적으로 접근이 되는 것을 확인할 수 있다.
  • 비밀번호가 postgres 로 변경되었다.

DB 생성 및 확인

  • test 서버에 접속을 했다면, 이제 DB생성을 해본 후, pgAdmin과 WSL2에서 각각 확인을 한다.
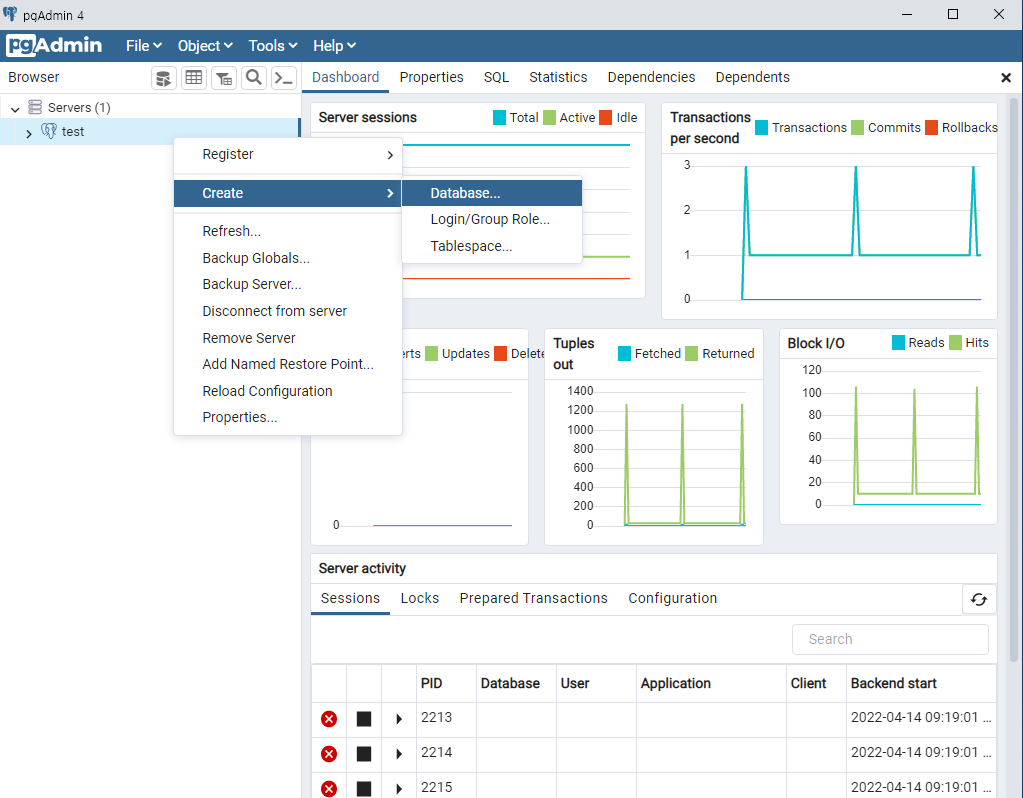
  • 먼저, Database에서 마우스 우클릭 후, 아래와 같이 순차적으로 클릭한다.

Databases 우클릭

→ create → database..

→ 새로운 데이터베이스명은 dataengineering으로 명명한다.

Untitled

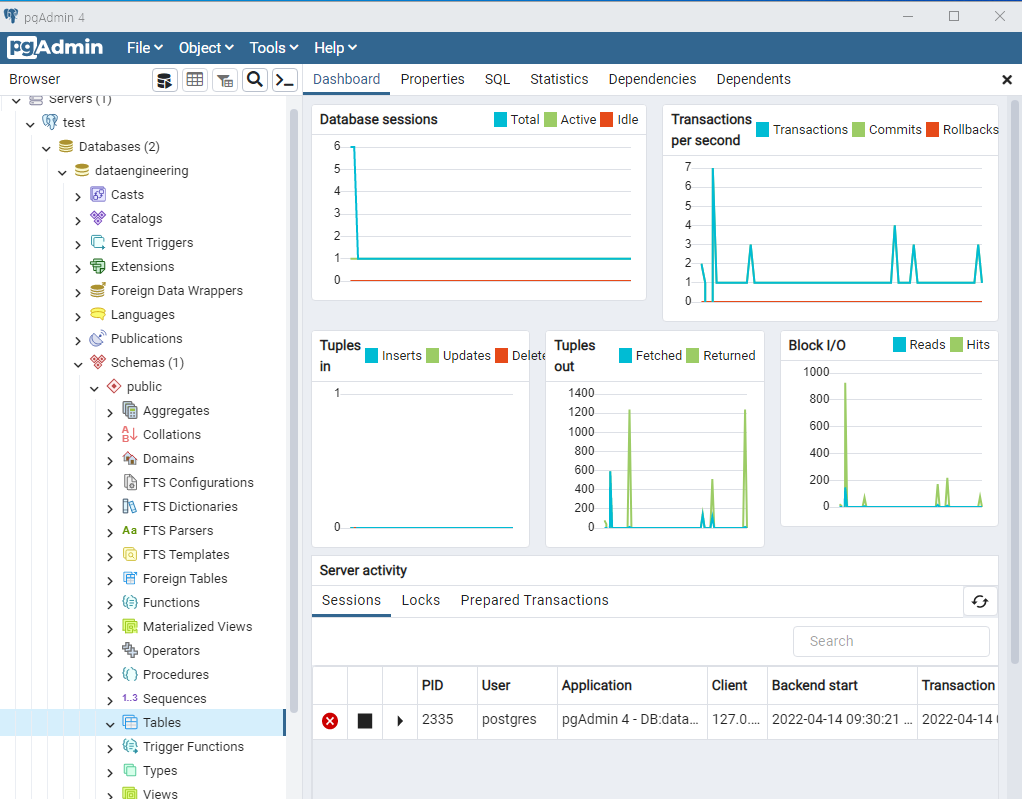
  • 이번에는 아래 그림과 같이 dataengineering 데이터베이스의 노드 중 shemas를 확장하고 다시 public을 확장한다.

Untitled

dataengineering

→ shemas

→ public

→ tables 우클릭

→ Create → Table

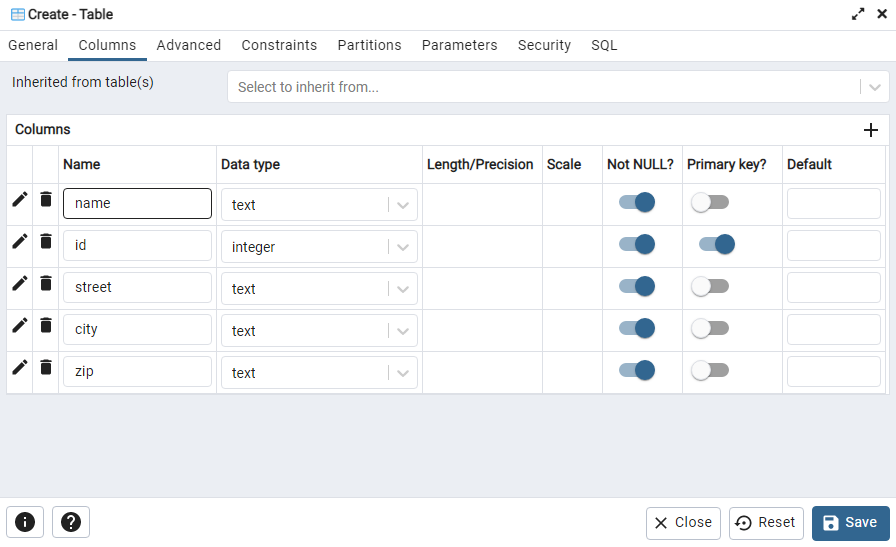
→ General 탭 Name 입력 : users

→ Column 탭에서는 아래와 같이 테이블 열을 추가한다

→ 우측의 + 버튼을 이용한다.

Untitled

wsl2 가상환경 : postgresql 서버 & DB

윈도우 : GUI - pgAdmin

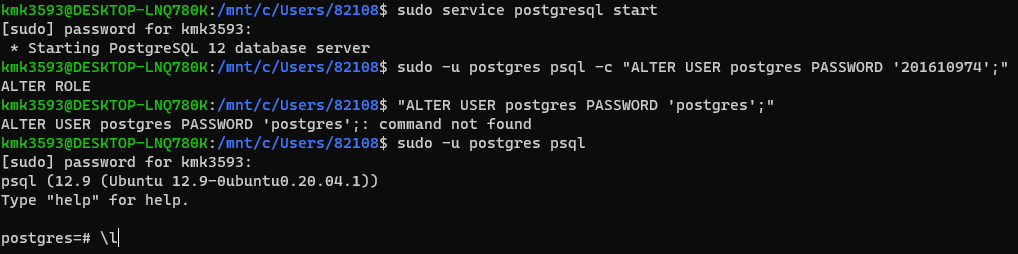
  • 이번에는 psql에 접속 후 dataengineering DB와 생성된 테이블을 조회하는 쿼리를 실행한다.

    • dataengineering 테이블이 조회되는지 확인한다.

    Untitled

    → sudo -u postgres psql (psql 접속 명령)

    → postgres=# 형태의 프롬프트가 출력된다.

    → 그림 맨 밑줄처럼 \l 을 입력하고 enter

    → dataengineering 이 출력되면 성공

이번에는 생성된 dataengineering DB에 연결 후, 테이블을 조회한다

→ sudo -u postgres psql ( psql에 접속)

→ postgres=# 형태의 프롬프트가 출력된다.

→ \c dataengineering

→ (dataengineering DB에 연결되어

dataengineering=# 형태로 바뀐다. )

→ \dt

→ users 테이블이 출력 되면 성공

→ \q 하여 빠져나온다.

→ sudo service postgresql stop 하여 DB 종료

→ 반드시 종료하자

Refefence

SQLAlchemy : 반드시 사용하자.

나중에라도 파이썬에 연결하여 사용한다.

https://www.sqlalchemy.org/

postgreSQL 실습

postgreSQL 실습_2