JavaScript Event
이벤트 객체
- Keyboard 및 Mouse 등의 입력장치에서는 이벤트가 발생함
- 발생한 Event의 속성값들을 대상으로 문서의 변경을 활용할 수 있음

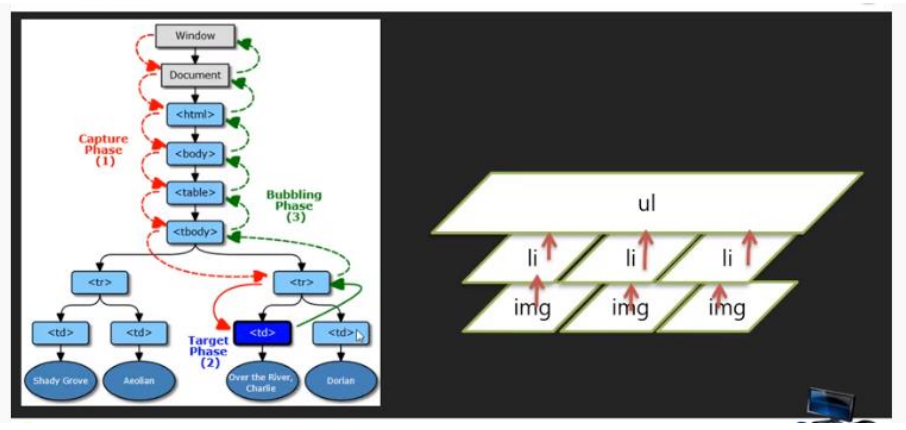
이벤트 관리
- 이벤트는 Window라는 객체가 모든 객체를 대상으로 관리하고 있음.
- 최하단의 객체의 이벤트는, 상위로 이벤트를 발생시키고 있음. (상위 객체에서 관리 가능함)
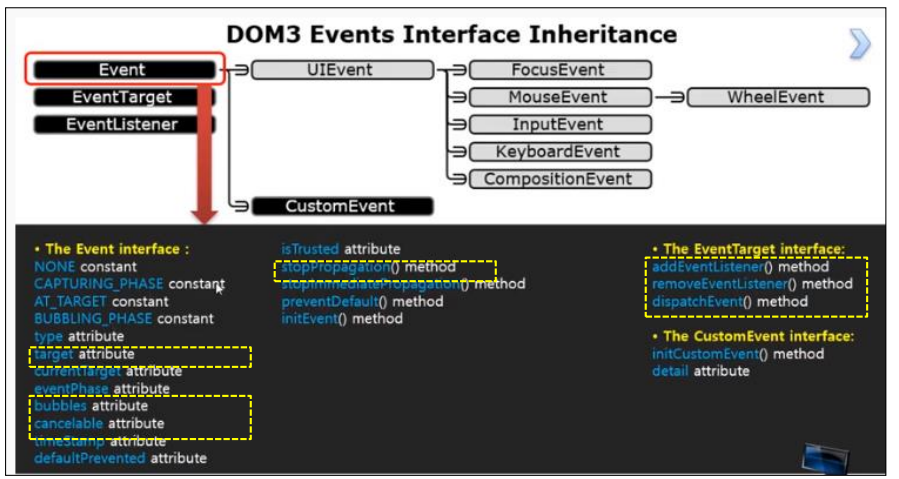
이벤트 객체의 메서드(1)
- EVENT 인터페이스가 최상단이며, UI > 키보드, 마우스(휠 포함) Event 인터페이스가 있다
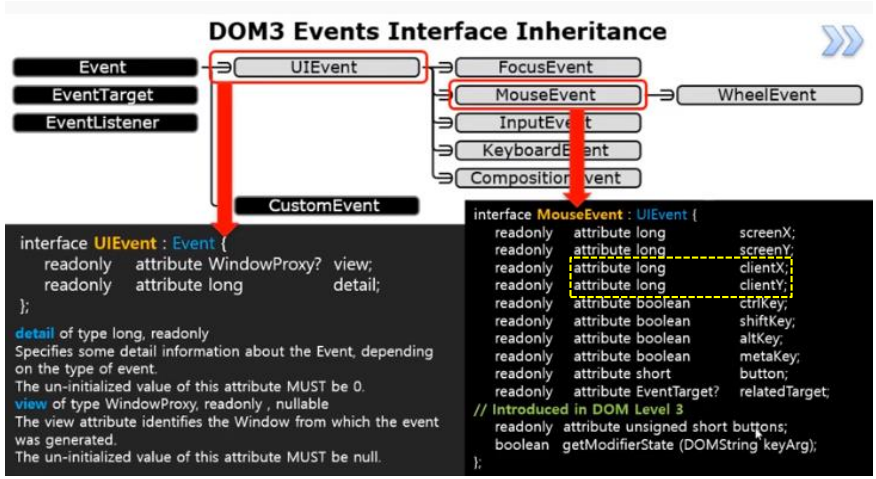
이벤트 객체의 메서드(2)
- EVENT 인터페이스가 최상단이며, UI > 키보드, 마우스(휠 포함) Event 인터페이스가 있음
- Mouse는 X,Y의 좌표를 확인할 수 있도록 인터페이스 제공함
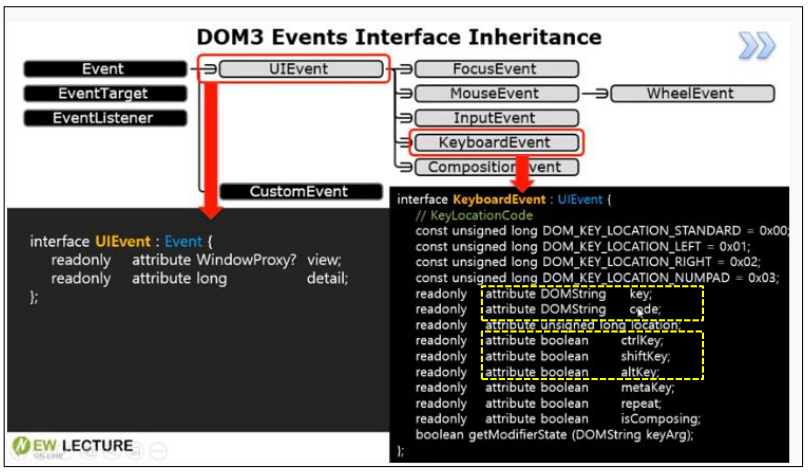
이벤트 객체의 메서드(3)
- EVENT 인터페이스가 최상단이며, UI > 키보드, 마우스(휠 포함) Event 인터페이스가 있음
- Keyboard는 눌려진 Key 및 ALT/SHIFT 등을 확인할 수 있도록 인터페이스 제공함
마우스 이벤트 실습
- 마우스 이벤트는 e.target이란 객체로 속성값들을 사용할 수 있음
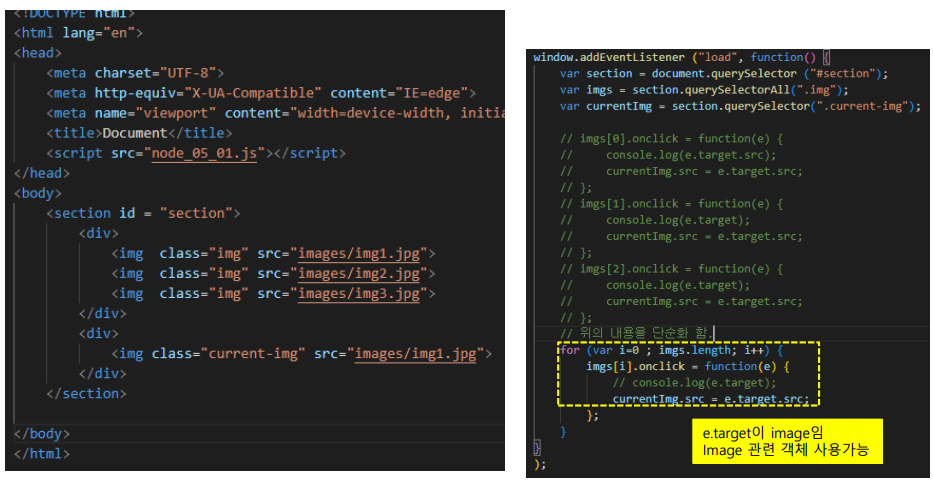
- event_01.html 일부
1 | <body> |
- event_01.js
1 | window.addEventListener("load", function(){ |
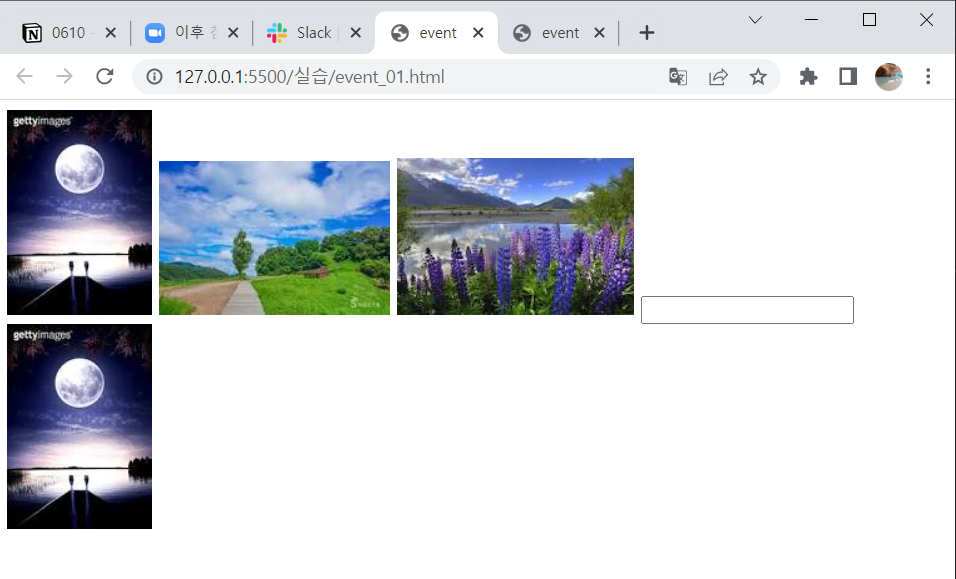
- 결과
- 클릭한 이미지가 아랫 열에 출력되도록 구현되었다
마우스 이벤트 실습 - trigger
- 특정 Element 이벤트는 다른 Element 이벤트를 호출할 수 있음 (트리거)
- Span tag의 클릭이 file 선택하는 input Tag를 클릭하게 함.
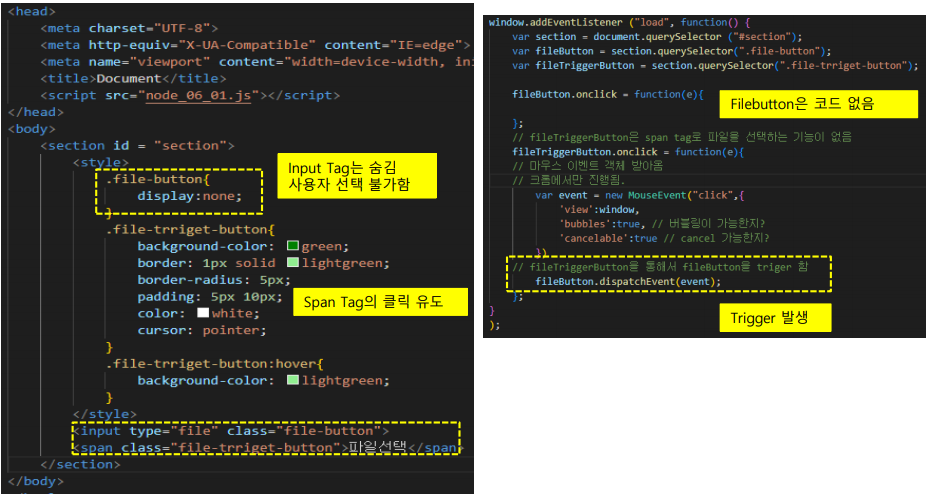
- trigger_01.html
1 |
|
- trigger_01.js
1 | window.addEventListener("load", function(){ |
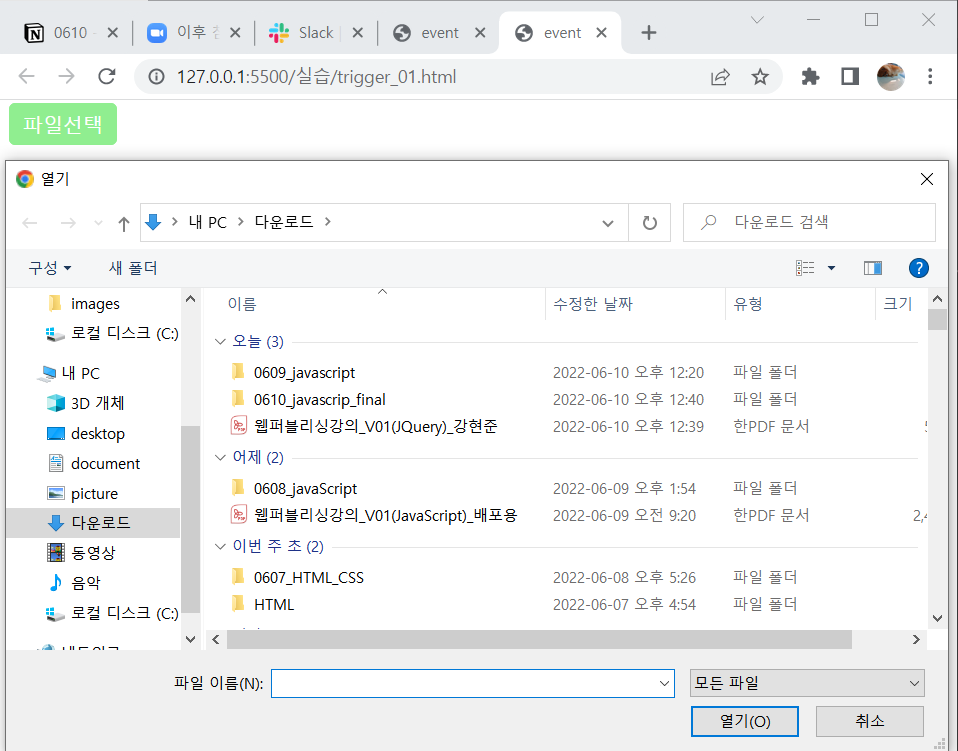
- 결과
- 파일 선택 후 의도한 결과가 출력되었다
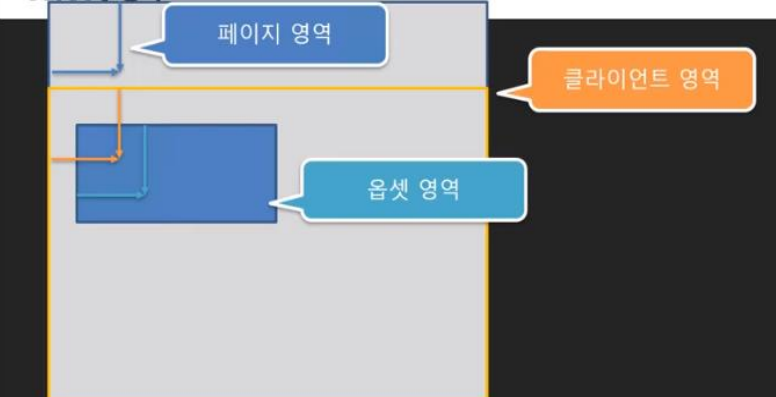
마우스 이벤트 실습 - X,Y 좌표 이용
- 마우스 이벤트 발생시 X,Y 좌표를 활용할 수 있음
- X,Y 좌표는 여러가지의 형태로 존재함.
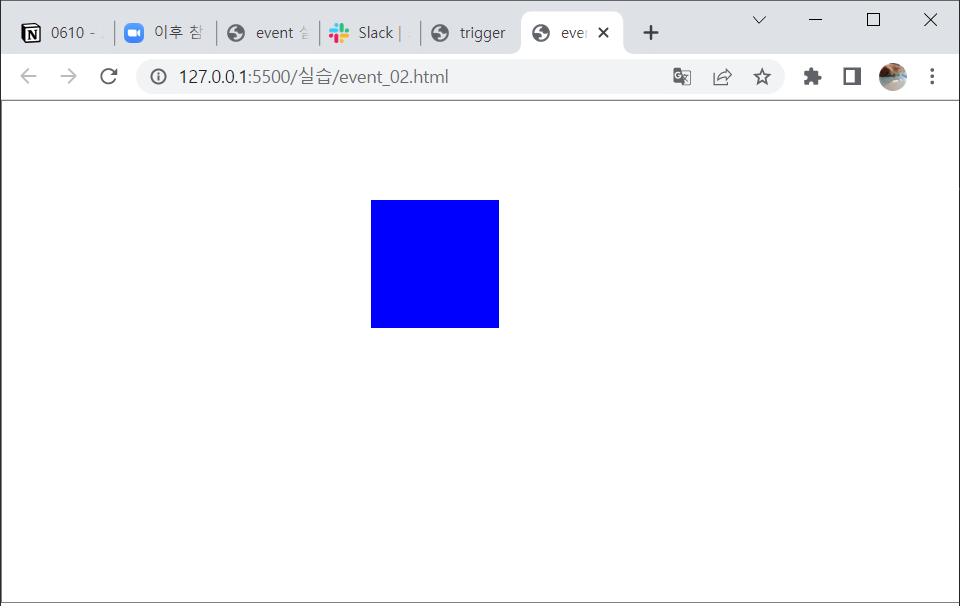
- 사각형을 만든다
- 클릭한 곳으로 사각형이 이동하도록 작성해보자
- event_02.html
1 |
|
- event_02.js
1 | window.addEventListener("load", function(){ |
- 결과
- 클릭한 위치로 사각형이 이동한다
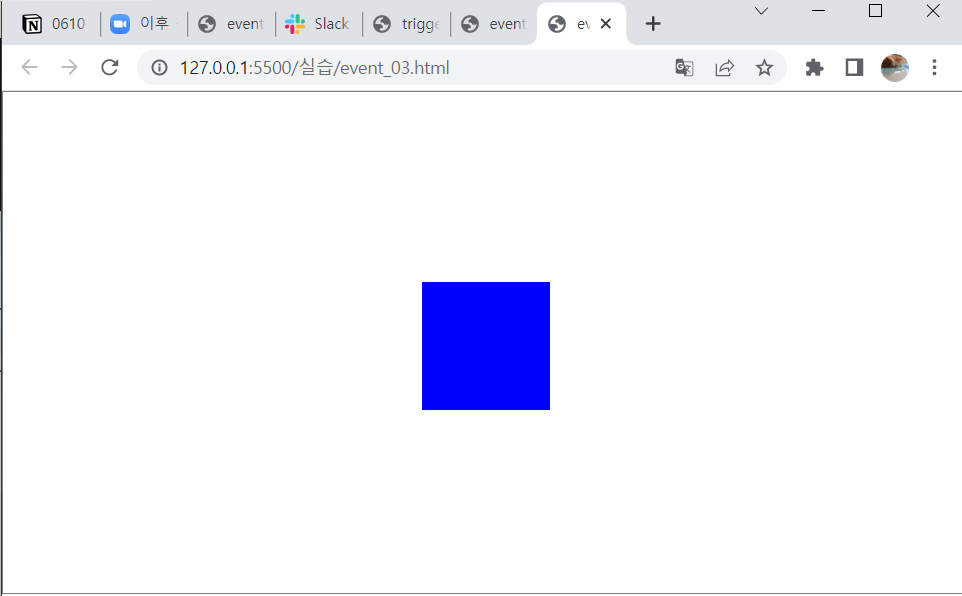
- 이번에는 사각형을 드래그하여 움직히에 한다
- event_02.js에 다음 코드를 추가한다
1 | let offset = {x:0, y:0}; |
- 캡처로만 봤을 때는 차이가 없지만 클릭 후에만 이동하도록 구현되었다
JavaScript Event
You need to set
install_url to use ShareThis. Please set it in _config.yml.