from tokenize import Token from pyspark.ml import Pipeline from pyspark.ml.classification import LogisticRegression from pyspark.ml.feature import HashingTF, Tokenizer
# 가상의 데이터 만들기 training = spark.createDataFrame([ (0, "a b c d e spark", 1.0), (1, "b d", 0.0), (2, "spark f g h", 1.0), (3, "hadoop mapreduce", 0.0) ], ["id", "text", "label"])
# Feature Engineering # 요리 작업
# 요리준비 1단계 : 텍스트를 단어로 분리 tokenizer = Tokenizer(inputCol='text', outputCol='words')
from struct import Struct from pyspark.sql import SparkSession from pyspark.sql import functions as func from pyspark.sql.types import StructType, StructField, IntegerType, LongType
from pyspark.sql import SparkSession from pyspark.sql import functions as func from pyspark.sql.types import StructType, StructField, IntegerType, LongType import codecs
print("Hello")
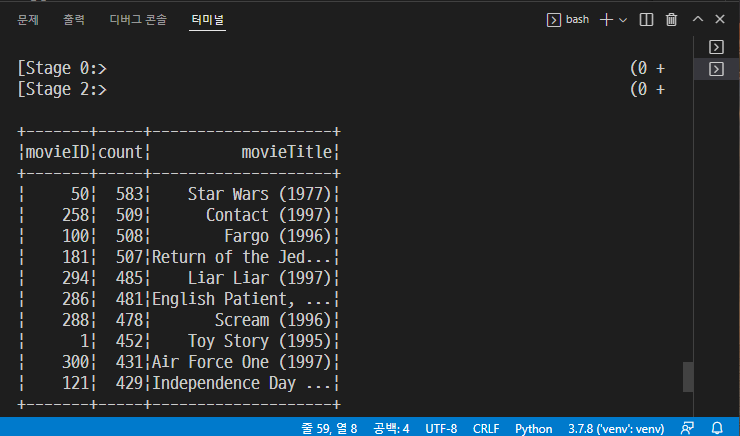
defloadMovieNames(): movieNames = {} with codecs.open("ml-100k/u.ITEM", "r", encoding="ISO-8859-1", errors="ignore") as f: for line in f: fields = line.split("|") movieNames[int(fields[0])] = fields[1] return movieNames