1
2
3
4
5
6
7
8
9
10
11
12
13
14
15
16
17
18
19
20
21
22
23
24
25
26
27
28
29
30
31
32
33
34
35
36
37
38
39
40
41
42
43
44
45
46
47
48
49
50
51
52
53
54
55
56
57
58
59
60
61
62
63
64
65
66
67
68
69
70
71
72
73
74
75
76
77
78
79
80
81
82
83
84
85
86
87
88
89
90
91
92
93
94
| from flask import Flask, request
import json
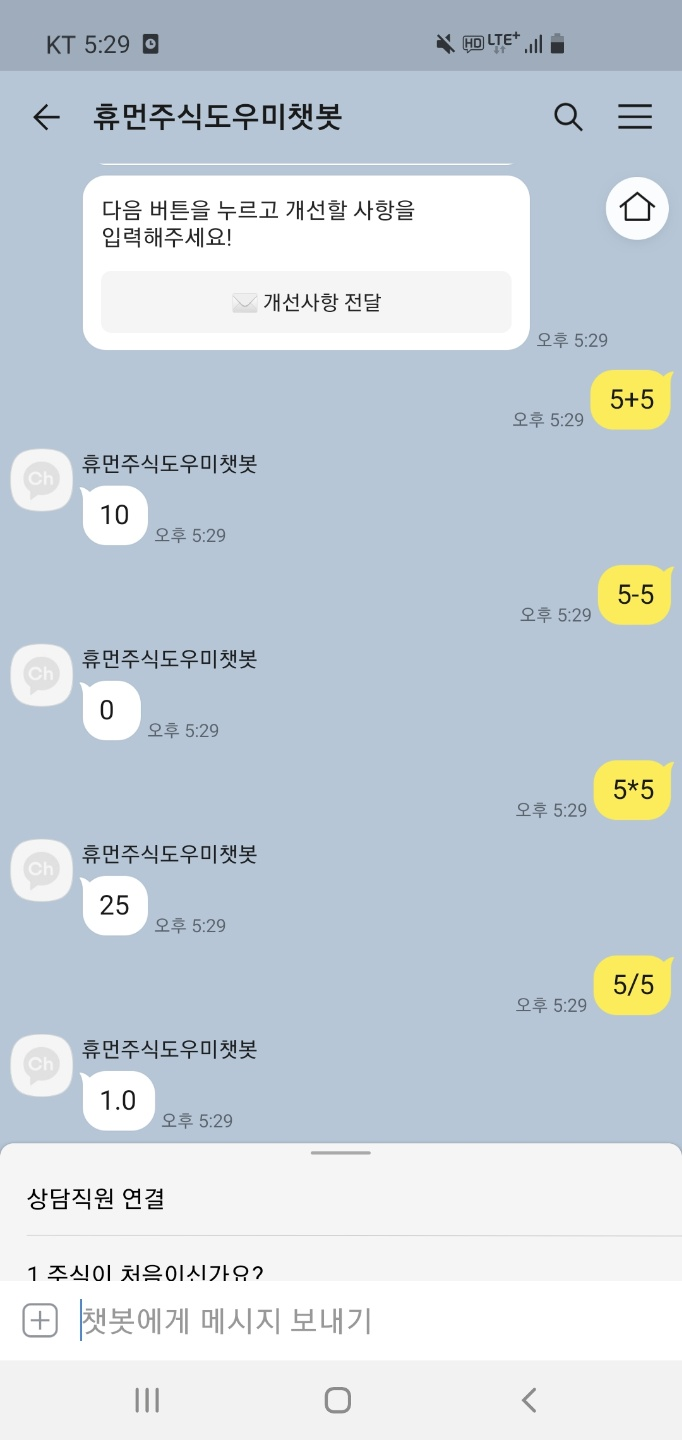
def cals(opt_operator, number01, number02):
if opt_operator == "addition":
return number01 + number02
elif opt_operator == "subtraction":
return number01 - number02
elif opt_operator == "multiplication":
return number01 * number02
elif opt_operator == "division":
return number01 / number02
app = Flask(__name__)
@app.route('/')
def hello_world():
return 'Hello, World!!!!!!!!!!!!!!!!!!!!!!!'
@app.route('/api/sayHello', methods=['POST'])
def sayHello():
body = request.get_json()
print(body)
print(body['userRequest']['utterance'])
responseBody = {
"version": "2.0",
"template": {
"outputs": [
{
"simpleText": {
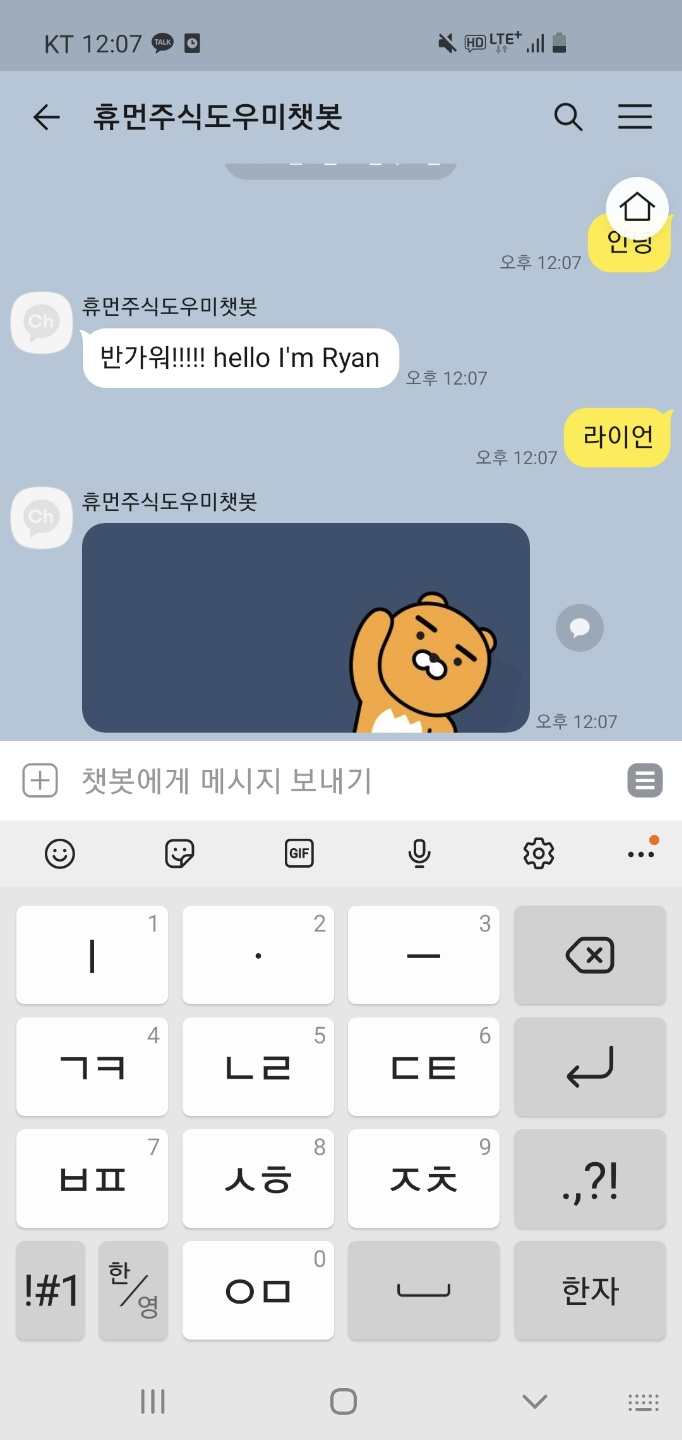
"text": "반가워!!!!! hello I'm Ryan"
}
}
]
}
}
return responseBody
@app.route('/api/showHello', methods=['POST'])
def showHello():
body = request.get_json()
print(body)
print(body['userRequest']['utterance'])
responseBody = {
"version": "2.0",
"template": {
"outputs": [
{
"simpleImage": {
"imageUrl": "https://t1.daumcdn.net/friends/prod/category/M001_friends_ryan2.jpg",
"altText": "hello I'm Ryan"
}
}
]
}
}
return responseBody
@app.route('/api/calCulator', methods=['POST'])
def calCulator():
body = request.get_json()
print(body)
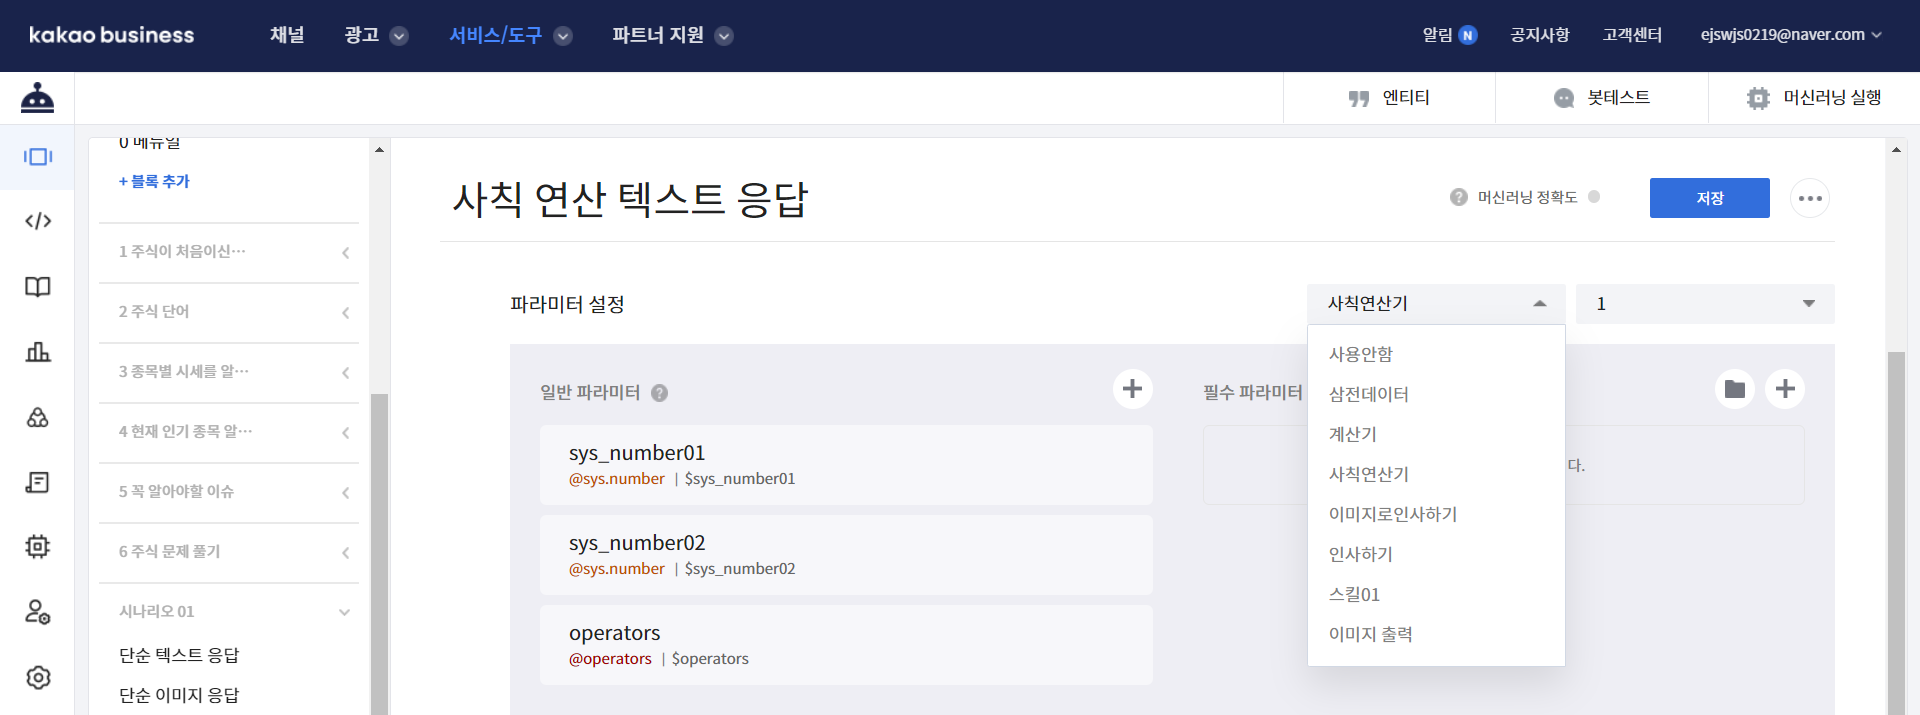
params_df = body['action']['params']
print(type(params_df))
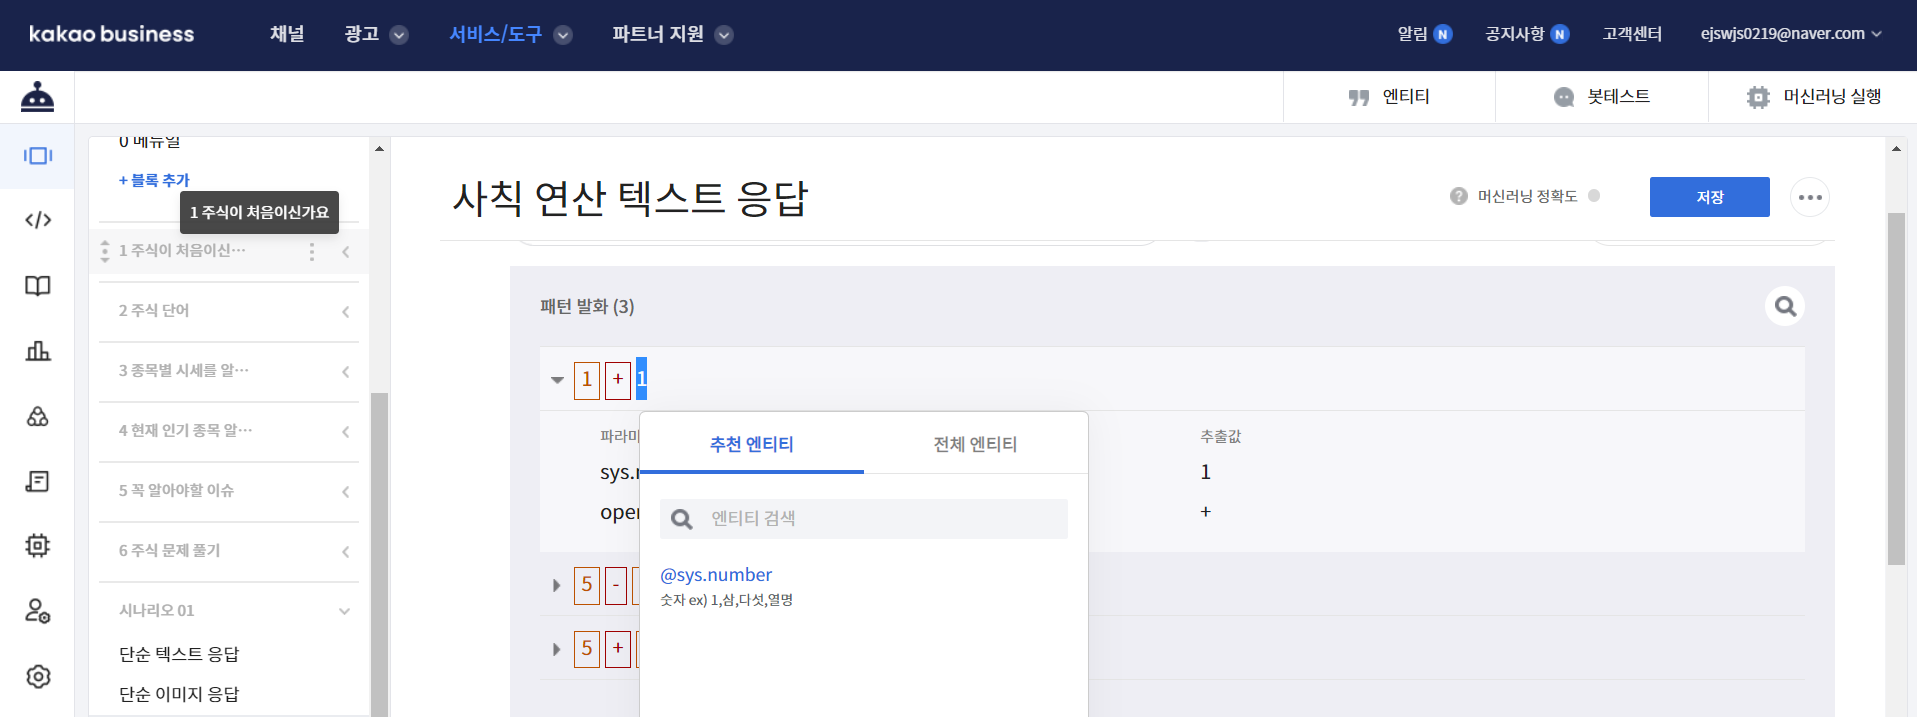
opt_operator = params_df['operators']
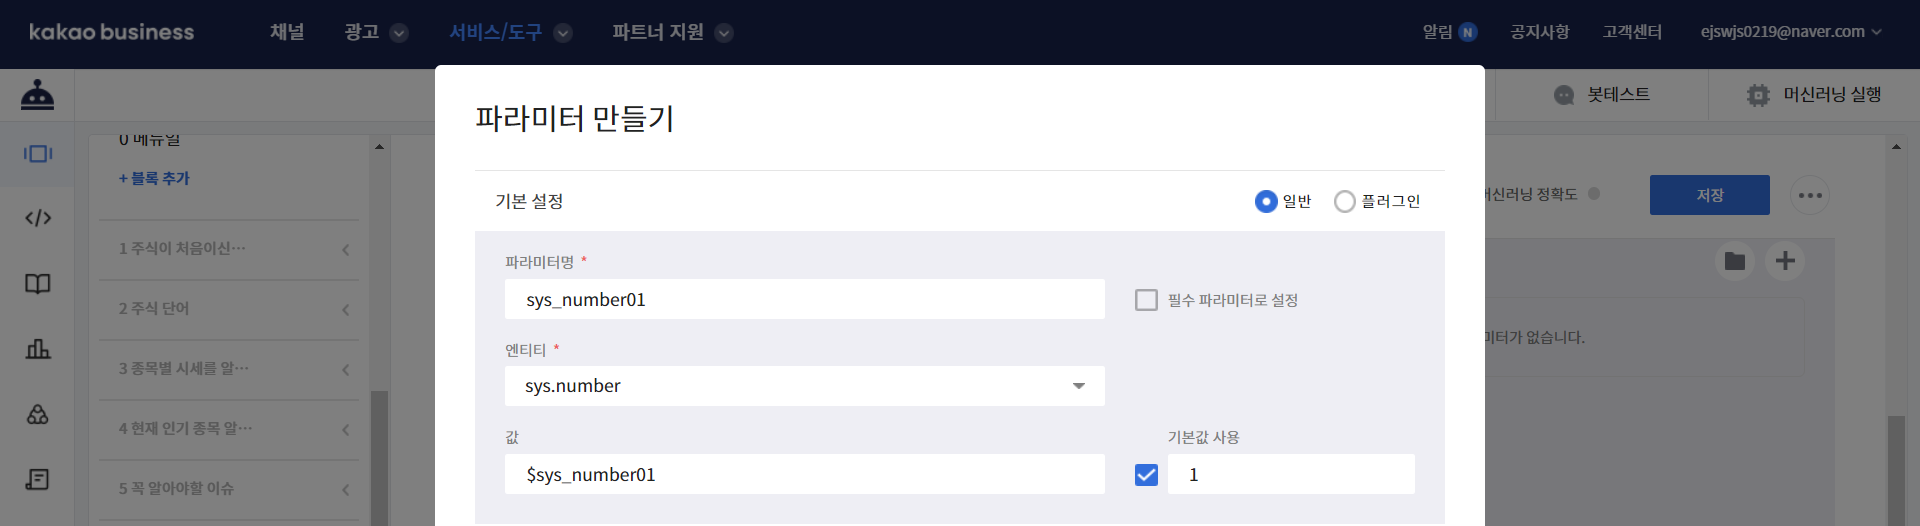
number01 = json.loads(params_df['sys_number01'])['amount']
number02 = json.loads(params_df['sys_number02'])['amount']
print(opt_operator, type(opt_operator), number01, type(number01))
answer_text = str(cals(opt_operator, number01, number02))
responseBody = {
"version": "2.0",
"template": {
"outputs": [
{
"simpleText": {
"text": answer_text
}
}
]
}
}
return responseBody
|